Blogger

CSS3 Thread Out Social Sharing Widget for Blogger

When it comes to attracting attention to yourself on the internet, nothing does a better job than share buttons. ;)

Whether its twitter or google plus, social media probably has a huge impact on your traffic. I set out to create an attention grabbing way to display buttons, and came up with this: a circle that expands revealing a bunch of Social Sharing Widget on hover.

This widget is created using Pure CSS3 and ShareThis social sharing plugin. This widget have 4 buttons: Facebook Like button, Google +1 button, Tweet button and main ShareThis button for more social sharing links.

social sharing widget

Note: This Blogger Social Sharing widget animated zoom out feature will only work on latest Browsers and won’t work with Internet Explorer ( not tested with IE 10 ).

Live Demo

Add CSS3 Thread Out Social Sharing Widget in Blogger

1. Login to Blogger Dashboard > Design tab > Edit Html

2. Click on Expand Template widgets check box

3. Search for <div class=’post-footer-line post-footer-line-1′> HTML tag

4. And Put Below Code immediately after it

<b:if cond='data:blog.pageType == &quot;item&quot;'>
<style type="text/css">
.ringMenu {
width: 100px;
margin: 150px auto;
}
.ringMenu ul {
list-style: none;
position: relative;
width: 100px;
color: white;
}
.ringMenu ul a {
color: white;
}
.ringMenu ul li {
-webkit-transition: all 0.3s ease-in-out;
-moz-transition: all 0.3s ease-in-out;
-o-transition: all 0.3s ease-in-out;
-ms-transition: all 0.3s ease-in-out;
transition: all 0.3s ease-in-out;
}
.ringMenu ul li a {
display: block;
width: 100px;
height: 100px;
background: rgba(50,50,50,0.7);
text-align: center;
line-height: 100px;
-webkit-border-radius: 50px;
border-radius: 50px;
font-size: 20px;
}
.ringMenu ul li a:hover {
background: rgba(230,150,20,0.7);
text-decoration: none;
}

.ringMenu ul li:not(.main) {
-webkit-transform: rotate(-180deg) scale(0);
-moz-transform: rotate(-180deg) scale(0);
-o-transform: rotate(-180deg) scale(0);
transform: rotate(-180deg) scale(0);
opacity: 0;
}
.ringMenu:hover ul li {
-webkit-transform: rotate(0) scale(1);
-moz-transform: rotate(0) scale(1);
-o-transform: rotate(0) scale(1);
transform: rotate(0) scale(1);
opacity: 1;
}
.ringMenu ul li.top {
-webkit-transform-origin: 50% 152px;
-moz-transform-origin: 50% 152px;
-o-transform-origin: 50% 152px;
transform-origin: 50% 152px;
position: absolute;
top: -70px;
left: 50px;
}
.ringMenu ul li.bottom {
-webkit-transform-origin: 50% -52px;
-moz-transform-origin: 50% -52px;
-o-transform-origin: 50% -52px;
transform-origin: 50% -52px;
position: absolute;
bottom: -70px;
left: 50px;
}
.ringMenu ul li.right {
-webkit-transform-origin: -52px 50%;
-moz-transform-origin: -52px 50%;
-o-transform-origin: -52px 50%;
transform-origin: -52px 50%;
position: absolute;
top: 10px;
right: -50px;
}
.ringMenu ul li.left {
-webkit-transform-origin: 152px 50%;
-moz-transform-origin: 152px 50%;
-o-transform-origin: 152px 50%;
transform-origin: 152px 50%;
position: absolute;
top: 10px;
left: -50px;
}
</style>
<div class="ringMenu">
<script type="text/javascript">var switchTo5x=false;</script>
<script type="text/javascript" src="http://w.sharethis.com/button/buttons.js"></script>
<script type="text/javascript">stLight.options({publisher: "ur-e9856caa-8f3b-40a6-82af-461e390fe167"});</script>
<ul>
<li class="main"><a href="#main">SHARE</a></li>
<li class="top"><span class='st_fblike_vcount' displayText='Like'></span></li>
<li class="right"><span class='st_sharethis_vcount' displayText='Share'></span></li>
<li class="bottom"><span class='st_plusone_vcount' displayText='+1'></span></li>
<li class="left"><span class='st_twitter_vcount' displayText='Tweet'></span></li>
</ul>
</div>
</b:if>

4. Save your Template and Done!

Related Widget : Animated Social Sharing Widget with Cool Hover!

Customization

The demo and post codes are same. You have to adjust this widget with your blog design ( how do I know your blog design look like ;) ).  No more customizations needed for this CSS3 Thread Out Social Sharing Widget CSS3 Thread Out Social Sharing Widget for Blogger for Blogger, but if you want you can replace ShareThis script with your regiestered ShareThis account script.

Once you’ve done that, save everything and check it out! Thanks for reading, and if you liked this little tutorial and socal sharing widget don’t forget to share. It really helps. :D

Click here for more stylish widgets

Killer Tips To Adopt Before You Start a Blog!

Do you want to start your own blog?

Have you ever thought that you also might get name, fame and money and your thoughts will reach the sky from your fruitful blog.

If yes then this post will surely going to work for you . :D

Being an owner of a blog is a responsible work  and you are ready to take responsibilities then match your thinking and responsibilities from the mentioned points below ,if this what you are thinking they go ahead start a blog and success will be on your way.

Read Also : 5 Basic Pillars of Creating Successful and Profitable Blog!

Tips To Adopt Before You Start a Blog!

Define Goals for your blog

Before you start a blog you need to set goals regarding its SEO as well as what would you expect from your blog, what you want to make it in next six months, what’s your main aim of starting a blog .Focus on your blog’s aim and you will get success for sure but if you do not know what you want to achieve from your blog then I suggest think of it because blogging is not a joke it needs lots of temperament and patience.

Know your Targeted Audience

 This is one of the most common tips that you should adopt that you should manage your contents and blog design according to the targeted audience. Suppose if your blog targets teenagers then you must avoid using technical writings that is generally used for professionals or corporate. Also you might keep in mind that the design should be well enough to bind teenagers so do some work on designing too. If you have a budget, work on an impressive logo and then start a blog.

Keep stock of Updated contents

Always remember that you need to update your blog with contents because people will not visit daily and look your older post so you must have a stock of updating your blog regularly, this will entertain your visitors and also would enhance your blogging style. So it is recommended that you save some contents in draft and then make them ready to publish when ever you need this will also help you to gain confidence with in you that you have a stock of contents .

Read : 12 Tips For Writing Engaging Content For Readers

Time is Money

Hope you all have heard this phrase .So if you want your blog to produce money for you then you must spend time on your blog. Visibility will add a glory to success of your blog. You must make sure that you have enough time to interact with your blog visitors through comments as if you will not respond to them they will also just ignore your blog. So be visible and let your blog loved by all not ignored by all.

Sharing your thoughts

Now days no one has been left from the craze of social media so before you start a blog it is my personal advice to build some reputation among bloggers by joining bloggers groups and liking fan pages of bloggers. So this reputation will work for your blog. As you have a reputation when you will share your blog contents in this groups and pages your contents will be loved by all and this will add glory to your blog and you will see much traffic coming from social media. This will surely make your blog successful.

Conclusion

Hope you have liked my views and pro bloggers will surely have adopted before starting a blog , it’s a secret that has been shared by you all so if you are thinking of having your own blog then try these tips and see your blog growing with in few months. It’s a trusted method and it works for sure, I would love to know any techniques if I had missed by mistake as a sack cannot stand alone it needs your support and encouragement.

Cool Floating Recent Tweets Widget for Blogs

cool floating twitter follower boxI recently Posted a cool twitter follower widget for blogger blog. Previous one is  a simple widget for sidebar.Today I’ve Floating Recent Tweets Widget For Blogger and WordPress Blog. When you move cursor on it. It pop out with Cool Floating Recent Tweets Widget. This is a great widget for you to increase twitter followers and force visitors to follow you. ;)
 
Below I’ll show you how to add this Cool Floating Recent Tweets Widget In Blogger and WordPress.


Live Demo

Adding Cool Floating Floating Recent Tweets Widget.

Adding Recent Tweets Widget To Blogger

  1. Go to Dashboard > Design > Page Elements.
  2. Click Add A Gadget. In window, select HTML/Javascript .
  3. Copy the code below and paste it inside the box.
  4. Click Save button.

Adding Recent Tweets Widget To WordPress

  1. Go to Dashboard > Appearance > Widgets > Available Widgets.
  2. Drag Text widget into a sidebar.
  3. Paste in the code.
  4. Save.
<style>img,a{border:0;}#on{visibility:visible;}#off{visibility:hidden;}#facebook_div{width:196px;height:353px;overflow:hidden;}#twitter_div{width:246px;height:353px;overflow:hidden;}#google_plus_div{width:152px;height:97px;overflow:hidden;margin-left:50px;margin-top:10px;}#knfeedburner_div{width:300px;height:97px;margin-top:25px;overflow:hidden;}#kakinetwork_div{width:300px;height:97px;overflow:hidden;}

#twitter_right{z-index:10004;border:2px solid #6CC5FF;background-color:#6CC5FF;width:246px;height:353px;position:fixed;right:-250px;}#twitter_right_img{position:absolute;top:-2px;left:-35px;border:0;}

#kakinetwork_right{z-index:10003;border:2px solid #303030;background-color:#fff;width:300px;height:97px;position:fixed;}#kakinetwork_right img{position:absolute;top:-2px;left:-101px;}/* left side style */#facebook_left{z-index:10005;border:2px solid #3c95d9;background-color:#fff;width:196px;height:353px;position:fixed;left:-200px;}#facebook_left img{position:absolute;top:-2px;right:-35px;}#facebook_left iframe{border:0px solid #3c95d9;overflow:hidden;position:static;height:360px;right:-2px;top:-3px;}#twitter_left{z-index:10004;border:2px solid #6CC5FF;background-color:#6CC5FF;width:246px;height:353px;position:fixed;left:-250px;}#twitter_left_img{position:absolute;top:-2px;right:-35px;border:0;}
#kakinetwork_left{z-index:10003;border:2px solid #303030;background-
color:#fff;width:300px;height:97px;position:fixed;}#kakinetwork_left img{position:absolute;top:-2px;right:-101px;}

</style><script src='http://ajax.googleapis.com/ajax/libs/jquery/1.7.1/jquery.min.js'></script><script type="text/javascript" src="http://apis.google.com/js/plusone.js"></script><script type="text/javascript">jQuery(document).ready(function(){ jQuery("#facebook_right").hover(function(){ jQuery(this).stop(true,false).animate({right:  0}, 500); },function(){ jQuery("#facebook_right").stop(true,false).animate({right: -200}, 500); });    jQuery("#twitter_right").hover(function(){ jQuery(this).stop(true,false).animate({right:  0}, 500); },function(){ jQuery("#twitter_right").stop(true,false).animate({right: -250}, 500); });     jQuery("#google_plus_right").hover(function(){ jQuery(this).stop(true,false).animate({right:  0}, 500); },function(){ jQuery("#google_plus_right").stop(true,false).animate({right: -154}, 500); });    jQuery("#feedburner_right").hover(function(){ jQuery(this).stop(true,false).animate({right:  0}, 500); },function(){ jQuery("#feedburner_right").stop(true,false).animate({right: -303}, 500); });    });</script>

<div id="on"><div id="twitter_right" style="top: 20%;"><div id="twitter_div"><img id="twitter_right_img" src="http://2.bp.blogspot.com/-fcEMbjMcVhI/UDzNfUCWxcI/AAAAAAAAAt4/p0lew_c7Sxw/s320/allbloggingtips.com-twitter-icon.png" /><script src="http://widgets.twimg.com/j/2/widget.js"></script><script>new TWTR.Widget({version: 2,type: 'profile',rpp: 4,interval: 1000,width: 246,height: 260,theme: {shell: {background: '#63BEFD',color: '#FFFFFF'},tweets: {background: '#FFFFFF',color: '#000000',links: '#47a61e'}},features: { loop: false,live: true,scrollbar: false,hashtags: false,timestamp: true,avatars: true,behavior: 'all' }}).render().setUser('allbloggingtips').start();</script></div></div></div>

</div>

Just replace allbloggingtips with your twitter username. That’s it! :D

Visit your Blogs to see it floating at the right side of your webpage. I hope this Floating Recent Tweets Widget will help you in increasing the number of your Twitter Followers. That’s all. If you face any problem in Floating Floating Recent Tweets Widget then don’t stop just drop your comments and Feel free to ask.

Are You Ignoring One Rule for Making Money Blogging?

Let’s cut to the chase: We all want making money blogging from our blogs.

Of course! ;)

During consulting sessions with bloggers it’s one of the first items we discuss. Everyone has seen the success stories, and we’d all love to be the next blogging superstar and making money blogging. But how?

When my clients ask how they can make money, I pause the conversation there and change directions. The conversation goes something like this.

Me: “So you’d like to earn money blogging?”

Client: “Yes, but I don’t know how.”

Me: “If you want to earn money for your efforts, you have to provide people with something, right?”

Client: “Yeah, sure.”

Me: “So I ask you, what do you provide to your readers that is so valuable?”

The conversation usually stops dead here. :D

I suggest that the client takes a day or two to ponder that question. Sometimes they come back with a solid idea, and we can build from there. Other times, though, they come back stumped. They’ll ask, “What do readers find valuable?” There’s a good answer to that, and it constitutes my one rule for making money from a blog.

You have to teach them something.

If you’re just re-blogging the news, or blogging your opinion on current events, you’re not teaching the reader much of anything. There’s an old saying about how everyone has opinions and how they all stink. That applies to bloggers, though you wouldn’t know it by the number of opinion-based blogs out there.

To stand out in the blogging world today, you have to be remarkable. That’s sad for opinion bloggers, because opinions are not remarkable. If you want an opinion on any subject, from the latest political news to the hot new gadget release, you can find it on any number of websites. Dozens of writers race to post updates to blogs, hoping that if they post first that readers will find them. But it’s just a shell game. There is no winner when blogging opinions.

If you ignore that rat race and focus on how you can become valuable to readers, then you might be onto something. And you might find not just one way, but many ways to make money from your blog. When you teach people something new, all sorts of opportunities start appearing.

Of course, after I tell clients about teaching through blogging, they always have a follow-up question: How can I teach people with my blog?. Here is my three-part answer.

Read Also : Want To Become A Famous Blogger? Then Read This!

How Can I teach people with blog & make money?

OK, So How can I teach people with my blog and start making money blogging? Here is my three-part answer.

1. Start with something you know

With the internet as your guide, you can learn about almost anything. Even if you’ve never known a thing about home improvement projects, you can learn plenty from instructional texts and videos on the web. But if you want to teach readers how to do something, chances are you’ll need a bit more knowledge. They’re looking for something deep and real, and your understanding based on other home improvement blogs won’t cut it.

Start by blogging about one of your passions. If you know a lot about using the internet to save money when shopping, then start a blog about that. You might not know everything there is to know, but you sure know something. You can start blogging with that knowledge. Of course, that won’t always be enough. You have to be always learning, which brings me to Part 2.

2. Dig deep, then deeper

Picking a familiar topic will help at first, but eventually you’ll have to learn even more about your subject. Why? Because if you don’t you’ll run out of material. Using the above example, if you don’t learn more about saving money online, you’ll never be able to keep up and teach your readers something new. You’ll eventually have taught them everything you know, and from there what can you do?

This goes especially for high-tech subjects. I have a buddy who installs video surveillance equipment for businesses and residences. Take a look at that link and look at all the stuff listed just on the very first page. If he didn’t keep up with those products, he’d never be able to keep up. The same goes for you and your blog. Learn it all, and then learn more.

3. Connect with readers

This goes for any blog, but it bears repeating in this instance. So many bloggers I know neglect to respond to their comments and emails*. If you’re

connect with readers

ignoring those, then how are you getting a feel for what your readers like and don’t like? It’s through these reader connections that we can help our blogs go. Unsurprisingly, this holds true even more so for blogs that teach.

* I submitted a guest post a few months ago and forgot to reply to the comments. Ammar was not happy, and I don’t blame him. Every blogger needs to respond to comments, or else why blog in the first place?

When you connect with readers you can find out your weak points. Maybe you explain certain points in an unclear way. Maybe you use too many words to describe something that needs only a few words. Whatever the reasons, your readers are able and willing to point them out. If you learn from them, as they learn from you, you’ll see enormous growth.

Read : 12 Tips For Writing Engaging Content For Readers

Why teaching works?

So many blog posts I read start with theories but never explain them. We’re just supposed to believe that this works, because the author said so. So before wrapping up, I’d just like to outline how you can make more money with a teaching blog than almost any other type of blog.

  1. Advertisers like teaching blogs. When you teach people things, they often need to buy resources that they don’t already own. That’s a perfect opportunity for an advertiser to step in. Display ads from ad networks typically don’t pay much, but on blogs with a teaching angle you can earn a higher CPM.
  2. Articles that teach people something spread on social media. If I read an article and learn something from it, you can bet I’ll share it to Twitter and Facebook. If I learned something, then maybe others in my social graph will learn something. And if they learn something, they might pass it on to their social graph. If you want to create content that spreads, try teaching people something. It’s the best form of blogging.
  3. Affiliate sales rule. Teaching blogs are tailor-made for affiliate marketing opportunities. You’ll have to be up-front about it, but it can be a big money-maker on a teaching blog. If you link people to the tools and resources they need, they’ll be more apt to buy from you. That means an opportunity to make even more money blogging.

Starting a blog that teaches, like a DIY blog, is never easy. But if you put in the time and effort you’ll find it more rewarding than any other kind of blog. You’ll be helping people do things, and you’ll be rewarded with a modest income. If you play your cards right, maybe even a high income. :)

Customized and Stylized Subscription Widget

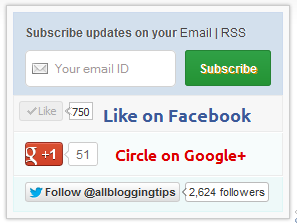
ABT widget sidebarMany of this blog readers asked me which plugin/code I’m using in sidebar for Stylized Subscription Widget. So today I decide to share this with you! because It’s almost more than 2 months. I’ve not shared any Stylized Subscription for Widget Blogger and WordPress Widget.

Coming back to topic this widget simple uses HTML and CSS. It’ll keep your sidebar clean! ;) It contains FeedBurner Form, Twitter Follow Button, Facebook and Google buttons.

To see demo copy code below and place it in our HTML Editor.

Adding Customized and Stylized Subscription Widget

You just need to place a code to your blog widget Follow following steps to add Customized and Stylized Subscription Widget to WordPress and Blogger both!

Adding Subscription Widget To Blogger

  1. Go to Dashboard > Design > Page Elements.
  2. Click Add A Gadget. In window, select HTML/Javascript .
  3. Copy the code below and paste it inside the box.
  4. Save the gadget. Drag the gadget and reposition it under Blog Posts gadget.
  5. Click Save button.

Adding Subscription Widget To WordPress

  1. Go to Dashboard > Appearance > Widgets > Available Widgets.
  2. Drag Text widget into a sidebar.
  3. Paste in the code.
  4. Save.

Code for Stylized Subscription Widget

<style>

 #ABT-mashable-bar {
background-color: #f9f9f9; box-shadow: 0 0 3px #b0b0b0;
     border:1px solid #ccc;
       padding:6px; 
width: 270px;

    }

#subscribe-box .fb-like-box { border: 1px solid #EBEBEB; padding: 5px; background:#f7f7f7;}
	#subscribe-box .gplusone { background: #f7fcfc; border: 1px solid #EBEBEB; border-top: 1px solid #fff; color: #000; font-size: 10px; line-height: 1px; padding: 9px 11px;}
	#subscribe-box .twitter-follow { background: #eef9f9; border: 1px solid #dff6f6; border-top: 1px solid #fff; padding:5px 11px;}

	#subscribe-box .email-box { 
   border-right: 1px solid #C7DBE2;
        border-left: 1px solid #C7DBE2;         background: #d3e0ed;

border: 1px solid #ccdaed;  padding:11px; margin-bottom: -4px;}

		#subscribe-box .email-box h4{color: #555;font-family: Arial;font-size: 12px; margin: 0 0 10px;}

#subscribe-box .email-box .txt,#subscribe-box .email-box .txt:focus{

border: 1px solid #d2d2d2;

color: #a19999; font-size: 12px;

border-radius: 5px;
-moz-border-radius: 5px;
-webkit-border-radius: 5px;

height:21px;

padding: 6px 28px 8px; width: 93px;

}

		#subscribe-box .email-box .btn,#subscribe-box .email-box .btn:focus{ float:right;

margin-top: 0px;

background: #30a146; 	background: linear-gradient(top, #30a146 0%, #249334 100%);  background: -moz-linear-gradient(top, #30a146 0%, #249334 100%);   background: -webkit-gradient(linear, left top, left bottom, color-stop(0%, #30a146), color-stop(100%, #249334));  background: -webkit-linear-gradient(top, #30a146 0%, #249334 100%);   text-shadow: 1px 1px 0 rgba(0, 0, 0, .4);  font-weight:bold;    font-family: "Droid Sans","Lucida Grande",Tahoma,sans-serif; 

    font-family: "Arial","Helvetica",sans-serif;
    border-radius:3px;
    -moz-border-radius:3px;
    -webkit-border-radius:3px;
    border:1px solid #248334 ;
    color:white;
    text-shadow:#d08d00 1px 1px 0;
    padding:8.5px 10px;
    margin-left:3px;
    font-weight:bold;
    font-size:12.2px;
    cursor:pointer;
    border-image: initial;} 

			#subscribe-box .email-box .btn:hover{

opacity: .8;
    border-radius:3px;
    -moz-border-radius:3px;
    -webkit-border-radius:3px;
    border:1px solid #248334  ;
    color:#FFFFFF;
    text-shadow:#d08d00 1px 1px 0}  

</style>

<div id="ABT-mashable-bar">
<div id="subscribe-box">
<div class="email-box">
<h4>Subscribe updates on your <a href="http://feedburner.google.com/fb/a/mailverify?uri=latestbloggingtips4u" target="_blank">Email</a> | <a href="http://feeds.feedburner.com/latestbloggingtips4u" target="_blank">RSS</a></h4>
<form action="http://feedburner.google.com/fb/a/mailverify" method="post" onsubmit="window.open('http://feedburner.google.com/fb/a/mailverify?uri=latestbloggingtips4u', 'popupwindow',  'scrollbars=yes,width=700px,height=700px');return true" target="popupwindow">
<input class="txt" style="background: #FFF  url('http://i.imgur.com/2BCD0.png') no-repeat 6px !important;" onfocus="if (this.value == 'Your email ID ')  {this.value = '';}" onblur="if (this.value == '') {this.value = 'Your email ID ';}" type="text" name="email" value="Your email ID " />

<input type="hidden" name="uri" value="latestbloggingtips4u" />

<input type="hidden" name="loc" value="en_US" />

<input class="btn" style="margin-left: 4px;" type="submit" value="Subscribe" />
<div style="clear: both;"></div>
</form></div>

<div class="fb-like-box"><iframe style="border: none; overflow: hidden; width: 80px; height: 21px;" src="//www.facebook.com/plugins/like.php?href=http%3A%2F%2Fwww.facebook.com%2Fallbloggingtips&send=false&layout=button_count&width=80&show_faces=false&action=like&colorscheme=light&font&height=21" frameborder="0" scrolling="no" width="320" height="240"></iframe><a style="color: #3b5998; font-family: ubuntu; font-size: 18px; font-weight: bold; line-height: 20px;" href="http://www.facebook.com/allbloggingtips" rel="nofollow" target="_blank"> Like on Facebook </a>
<div class="clear"></div>
</div>

<div class="gplusone">
<div style="float: left; width: 90px;">
<div id="___plusone_0" style="height: 24px; width: 106px; display: inline-block; text-indent: 0pt; margin: 0pt; padding: 0pt; background: none repeat scroll 0% 0% transparent; border-style: none; float: none; line-height: normal; font-size: 1px; vertical-align: baseline;"><iframe id="I1_1322986463651" style="position: static; left: 0pt; top: 0pt; width: 106px; margin: 0px; border-style: none; height: 24px; visibility: visible;" title="+1" name="I1_1322986463651" src="https://plusone.google.com/_/+1/fastbutton?url=http%3A%2F%2Fwww.allbloggingtips.com%2F&size=standard&count=true&annotation=&hl=en-US&jsh=m%3B%2F_%2Fapps-static%2F_%2Fjs%2Fwidget%2F__features__%2Frt%3Dj%2Fver%3D-8uDua_W7bo.en_GB.%2Fsv%3D1%2Fam%3D%218NuGo4ypxRCIwtBaLA%2Fd%3D1%2F#id=I1_1322986463651&parent=http%3A%2F%2Fwww.allbloggingtips.com&rpctoken=511986996&_methods=onPlusOne%2C_ready%2C_close%2C_open%2C_resizeMe" frameborder="0" marginwidth="0" marginheight="0" scrolling="no" width="100%" height="240"></iframe></div>
</div>
<a style="color: #dd0000; font-family: ubuntu; font-size: 16px; font-weight: bold; line-height: 24px;" href="https://plus.google.com/103280517588083500359" rel="author" target="_blank">Circle on Google+</a>
<div class="clear"></div>
<!-- Place this render call where appropriate -->

<script type="text/javascript">// <![CDATA[
  (function() {

    var po = document.createElement('script'); po.type = 'text/javascript'; po.async = true;

    po.src = 'https://apis.google.com/js/plusone.js';

    var s = document.getElementsByTagName('script')[0]; s.parentNode.insertBefore(po, s);

  })();
// ]]></script></div>
<div class="twitter-follow">
 <iframe style="width: 300px; height: 20px;" title="" src="http://platform.twitter.com/widgets/follow_button.html#_=1322986464549&button=blue&id=twitter-widget-22&lang=en&screen_name=allbloggingtips" frameborder="0" scrolling="no" width="320" height="240"></iframe>

<script type="text/javascript" src="//platform.twitter.com/widgets.js"></script></div>
<div id="mashable" style="height: 12px; background: #f9f9f9; border: 0px solid #CCC; border-top: 1px solid white; text-align: right; border-image: initial; font-size: 10px;"><span class="author-credit" style="font-family: Arial, Helvetica, sans-serif;"><a href="http://www.allbloggingtips.com" target="_blank">Widget »</a></span></div>
</div>
</div>

If you face any problem with code. Please download this code..

Customization!

Due to some issue. I can’t highlight changes you’ve to make in above code. Hope you won’t mind ;) . Now look for bold letter above and replace it with your Username, IDs like;

  • Replace latestbloggingtips4u with your feedburner Feed URL.
  • Replace allbloggingtips with your facebook Page URL.
  • Replace allbloggingtips with your twitter url.
  • Replace allbloggingtips with your blog URL.
  • And at least replace 103280517588083500359 with your Google+ Profile Link.

Credits!

This widget is first shared on AllBloggingTips. Readers are requested to link back if you’re going to share this widget on their blog!

That’s all. I hope you’ll like this widget. Let me know if I missed anything or you face any issue!

Happy Blogging :D