Another Pure CSS3 Multi Level Drop Down Menu V3
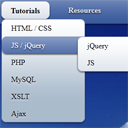
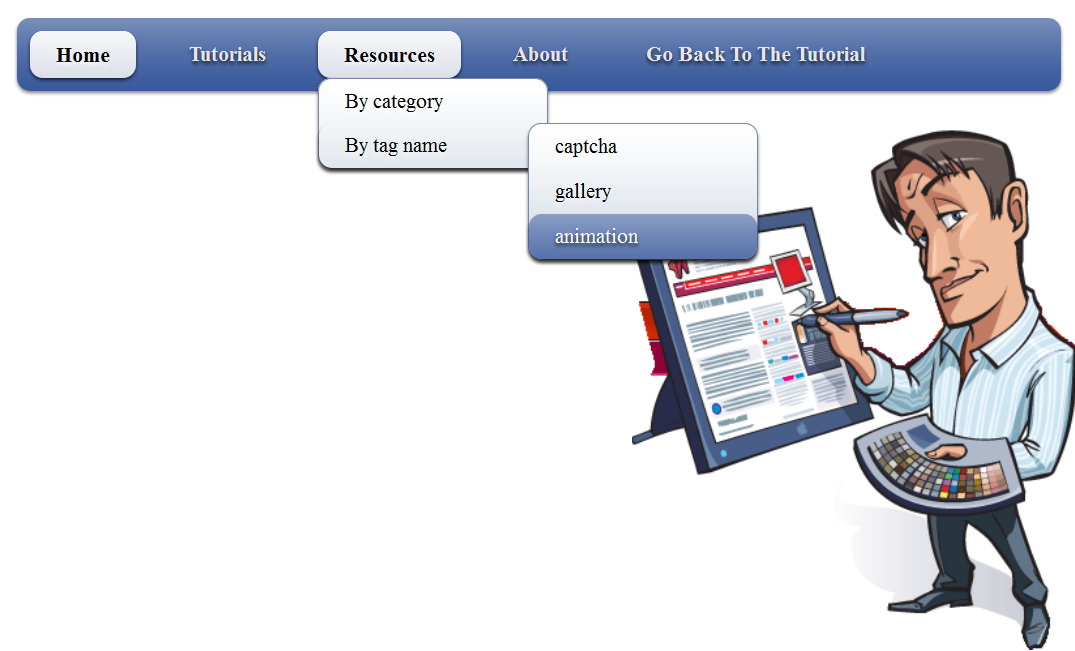
 After getting some positive comments, search engine visitors of previous Drop Down Menus V1 and Pure CSS3 Menu V3. We decided to release Another Pure CSS3 Drop Down Menu V3 For Blogger. This Multi Level Drop Down Menu is modifed version of previous css3 menu v2. I had added some cool features to this menu. This menu is a Stylish Pure CSS3 Multi Level Drop Down Menu For Blogger. It is compatible for almost all browsers like Mozilla Firefox and Google Chrome etc but the rounded corners and shadow will not be rendered properly. This Multi Level Drop Down Menu is only available on WordPress but I had converted it into Blogger users and had made installation so easy you just need to copy and paste menu code in your blogger blog widget. This Menu is provided by Script-Tutorials guys and it is widgetized and made compatible with Blogspot blog platform by ABT.
See Also
- Css3 Pure Menu V2 For Blogger
- Css3 Drop Down Menu For Blogger V1
- Smooth Multi Level Drop Down Menu for Blogger
Another Pure CSS3 Multi Level Drop Down Menu V3 Preview

Add Pure CSS3 Multi Level Drop Down Menu V3 To Blogger
Adding CSS Code
- Go To Blogger > Layout > Edit HTML
- Search For ]]></b:skin>
- And paste the code below just above ]]></b:skin>
#nav {
display:inline-block;
width:100%;
margin:0px auto;
padding:0;
background:#335599 url(http://2.bp.blogspot.com/-FVx5AvxIkpg/TzP9VsBWmrI/AAAAAAAAAVk/5D5V1QHAhOQ/s320/bg-ABT.png) repeat-x 0 -110px;border-radius:10px; /*some css3*/
-moz-border-radius:10px;
-webkit-border-radius:10px;
box-shadow:0 2px 2px rgba(0,0,0, .5);
-moz-box-shadow:0 2px 2px rgba(0,0,0, .5);
-webkit-box-shadow:0 2px 2px rgba(0,0,0, .5);
}
#nav li {
margin:10px;
float:left;
position:relative;
list-style:none;
}
#nav a {
font-weight:bold;
color:#e7e5e5;
text-decoration:none;
display:block;
padding:8px 20px;border-radius:10px; /*some css3*/
-moz-border-radius:10px;
-webkit-border-radius:10px;
text-shadow:0 2px 2px rgba(0,0,0, .7);
}/* selected menu element */
#nav .current a, #nav li:hover > a {
background:#7788aa url(http://2.bp.blogspot.com/-FVx5AvxIkpg/TzP9VsBWmrI/AAAAAAAAAVk/5D5V1QHAhOQ/s320/bg-ABT.png) repeat-x 0 -20px;
color:#000;
border-top:1px solid #f8f8f8;box-shadow:0 2px 2px rgba(0,0,0, .7); /*some css3*/
-moz-box-shadow:0 2px 2px rgba(0,0,0, .7);
-webkit-box-shadow:0 2px 2px rgba(0,0,0, .7);
text-shadow:0 2px 2px rgba(255,255,255, 0.7);
}/* sublevels */
#nav ul li:hover a, #nav li:hover li a {
background:none;
border:none;
color:#000;
}
#nav ul li a:hover {
background:#335599 url(http://2.bp.blogspot.com/-FVx5AvxIkpg/TzP9VsBWmrI/AAAAAAAAAVk/5D5V1QHAhOQ/s320/bg-ABT.png) repeat-x 0 -100px;
color:#fff;border-radius:10px; /*some css3*/
-moz-border-radius:10px;
-webkit-border-radius:10px;
text-shadow:0 2px 2px rgba(0,0,0, 0.7);
}#nav ul li:first-child > a {
-moz-border-radius-topleft:10px; /*some css3*/
-moz-border-radius-topright:10px;
-webkit-border-top-left-radius:10px;
-webkit-border-top-right-radius:10px;
}
#nav ul li:last-child > a {
-moz-border-radius-bottomleft:10px; /*some css3*/
-moz-border-radius-bottomright:10px;
-webkit-border-bottom-left-radius:10px;
-webkit-border-bottom-right-radius:10px;
}/* drop down */
#nav li:hover > ul {
opacity:1;
visibility:visible;
}
#nav ul {
opacity:0;
visibility:hidden;
padding:0;
width:175px;
position:absolute;
background:#aabbcc url(http://2.bp.blogspot.com/-FVx5AvxIkpg/TzP9VsBWmrI/AAAAAAAAAVk/5D5V1QHAhOQ/s320/bg-ABT.png) repeat-x 0 0;
border:1px solid #7788aa;border-radius:10px; /*some css3*/
-moz-border-radius:10px;
-webkit-border-radius:10px;
box-shadow:0 2px 2px rgba(0,0,0, .5);
-moz-box-shadow:0 2px 2px rgba(0,0,0, .5);
-webkit-box-shadow:0 2px 2px rgba(0,0,0, .5);-moz-transition:opacity .25s linear, visibility .1s linear .1s;
-webkit-transition:opacity .25s linear, visibility .1s linear .1s;
-o-transition:opacity .25s linear, visibility .1s linear .1s;
transition:opacity .25s linear, visibility .1s linear .1s;
}
#nav ul li {
float:none;
margin:0;
}
#nav ul a {
font-weight:normal;
text-shadow:0 2px 2px rgba(255,255,255, 0.7);
}
#nav ul ul {
left:160px;
top:0px;
}
Adding HTML of Menu
- Go To Blogger > Design
- Click choose a gadget
- Select HTML/javascript widget
- Paste the following code inside it
    <ul id="nav">
        <li><a href="#">Home</a></li>
        <li><a href="#">Tutorials</a>
            <ul>
                <li><a href="#">HTML / CSS</a></li>
                <li><a href="#">JS / jQuery</a>
                    <ul>
                        <li><a href="#">jQuery</a></li>
                        <li><a href="#">JS</a></li>
                    </ul>
                </li>
                <li><a href="#">PHP</a></li>
                <li><a href="#">MySQL</a></li>
                <li><a href="#">XSLT</a></li>
                <li><a href="#">Ajax</a></li>
            </ul>
        </li>
        <li><a href="#">Resources</a>
            <ul>
                <li><a href="#">By category</a>
                    <ul>
                        <li><a href="#">PHP</a></li>
                        <li><a href="#">MySQL</a></li>
                        <li><a href="#">XSLT</a></li>
                        <li><a href="#">Ajax</a></li>
                    </ul>
                </li>
                <li><a href="#">By tag name</a>
                    <ul>
                        <li><a href="#">captcha</a></li>
                        <li><a href="#">gallery</a></li>
                        <li><a href="#">animation</a></li>
                    </ul>
                </li>
            </ul>
        </li>
        <li><a href="#">About</a></li>
        <li><a href="http://www.allbloggingtips.com">Go Back To The Tutorial</a></li>
    </ul>
Now kindly make these customization changes to add your own links to menu:
- Each TAB can be edited by directly understanding the following HTML code,
<li><a href=”#“>TAB TEXT</a></li>
In each case replace the hash sign (#) with your page URL or link and replace the text with your page title. I have kept the page titles unchanged in the code above so that you could easily edit them by seeing the demo.
Credits
This Another Pure CSS3 Multi Level Drop Down Menu V3 For Blogger is first shared on AllBloggingTips. Bloggers are requested to link back if they are going to share above widget with there visitors.
