Another Cool jQuery Popup For Facebook Like Box – v2

jQuery Popup For Facebook Like BoxAfter our previous Cute jQuery Popup For Facebook Like Box.  We decided to release Another Cool jQuery Popup For Facebook Like Box – v2. This is a great widget to increase likes. You may see on most sites or blogs which are using Popups to increase there subscribers, fans and followers.  As soon as new visitors arrive your blog the popup will be showed to your visitors which can help you to increase likes and get more traffic from Facebook.

Check out demo below and than I show you How to Add Another Cool jQuery Popup For Facebook Like Box – v2  in Blogger or WordPress?

Live Demo

How To Another Cool jQuery Popup For Facebook Like Box – v2

I am discussing here steps for WordPress and Blogger but if you know how to deal simple HTML code then you can easily add it to your any blog too.

Adding To Blogger

  1. Go to Design > Page Elements.
  2. Click Add A Gadget.
  3. In Add A Gadget window, select HTML/Javascript .
  4. Copy the code below and paste it inside the content box.
  5. Save the gadget.
  6. Drag the gadget and reposition it under Blog Posts gadget.
  7. Click Save button (top right hand corner).

Adding To WordPress

  1. Go to Dashboard > Appearance > Widgets > Available Widgets.
  2. Drag Text widget into a sidebar.
  3. Paste in the code.
  4. Save.


Download Code Here!

Make this simple change:

  • Replace allbloggingtips with your facebook username.
  • Replace latestbloggingtips4u with your feedburner name

Are you Want the widget to appear Repeatedly

If you want to prompt the likebox every time the visitor enters your blog then simply delete this *30 from the code above.
Visit your blog to see Facebook popup. To review the widget again and again just delete your browser cookies and refresh the page to see it appearing again. That’s it a cool Facebook pop up widget that will surly increase your facebook fan count.Thanks again to MBT for the original gadget.

jQuery Popup For Facebook Like Box

Need Help?

I hope that all unanswered queries on the previous tutorial are covered in this post. If you still need help in changing colors and other stuff then you are most welcomed to post your queries below. Have a nice day pals! )

New Floating Social Media Buttons With Cool Hover Effect

Today  I comes with New Floating Social Media Buttons With Cool Hover Effect. You can add floating social media buttons to WordPress and Blogger. You may have seen floating social media buttons on other website and blogs but we try to provide you some unique style widget which you never seen anywhere. I made this into a simple widget so you don’t need to go into your template or theme source just paste code below to your blog.

Only of best feature of this is a hover effect. When you hover your mouse the button comes with a cool background hover. I had included some most used social media sharing buttons like Google+, Facebook Like Buttons, Stumbleupon, Twitter and Digg. Each of them comes with a live counter.You can add more social bookmarking or sharing buttons later if you wish.


Social Media Sharing Buttons from ABT


Live Demo


Adding Floating Social Media Buttons With Cool Hover Effect

You just need to place a code to your blog widget Follow following steps to add floating social media buttons to WordPress and Blogger.

Adding To Blogger

  1. Go to Design > Page Elements.
  2. Click Add A Gadget.
  3. In Add A Gadget window, select HTML/Javascript .
  4. Copy the code below and paste it inside the content box.
  5. Save the gadget.
  6. Drag the gadget and reposition it under Blog Posts gadget.
  7. Click Save button (top right hand corner).

Adding To WordPress

  1. Go to Dashboard > Appearance > Widgets > Available Widgets.
  2. Drag Text widget into a sidebar.
  3. Paste in the code.
  4. Save.
 <!-- floating share bar Start AllBloggingTips.com-->
<style type="text/css">
.sbutton{
background:#f0f0f0;
cursor:pointer;
color:#fff;
border:none;
padding:4px;
text-shadow:0 -1px 1px rgba(0,0,0,0.25);
-moz-border-radius:6px;
-webkit-border-radius:6px;
border-radius:6px; margin-left:8px;
font:12px sans-serif;
}
.sbutton:hover{
background:#336699;
}
#pageshare {position:fixed; bottom:15%; margin-left:-81px; float:left; border-radius:5px;-moz-border-radius:5px;-webkit-border-radius:5px;background:#fff;border: 1px solid #f7f7f7; padding:0 0 2px 0;z-index:10;}
#pageshare .sbutton {float:left;clear:both;margin:5px 2px 0 5px;}
#pageshare:hover {-moz-border-radius:6px;
    -moz-box-shadow: 0 2px 4px hsla(0,0%,0%,.35);
    -webkit-box-shadow: 0 2px 4px hsla(0,0%,0%,.35);border: 1px solid #ddd;}
.fb_share_count_top {width:48px !important;}
.fb_share_count_top, .fb_share_count_inner {-moz-border-radius:3px;-webkit-border-radius:3px;}
.FBConnectButton_Small, .FBConnectButton_RTL_Small {width:49px !important; -moz-border-radius:3px;/*bs-fsmsb*/-webkit-border-radius:3px;}
.FBConnectButton_Small .FBConnectButton_Text {padding:2px 2px 3px !important;-moz-border-radius:3px;-webkit-border-radius:3px;font-size:8px;}
</style>
<div id='pageshare' title="Get this from AllBloggingTips.com">
<div class='sbutton' id='fb'>
<a name="fb_share" type="box_count" href="http://www.facebook.com/sharer.php">Share</a><script src="http://static.ak.fbcdn.net/connect.php/js/FB.Share" type="text/javascript"></script>
</div>

<div class='sbutton' id='su'>
<script src="http://www.stumbleupon.com/hostedbadge.php?s=5"></script>
</div>

<div class='sbutton' id='digg' style='margin-left:3px;width:48px'>
<script src='http://widgets.digg.com/buttons.js' type='text/javascript'></script>
<a></a>
</div>
<div class='sbutton' id='gplusone'>
<script type="text/javascript" src="https://apis.google.com/js/plusone.js"></script>
<g:plusone size="tall"></g:plusone>
</div>
<div class='sbutton' id='rt'>
<a class='twitter-share-button' data-count='vertical' href='https://twitter.com/share'>Tweet</a><script src='//platform.twitter.com/widgets.js' type='text/javascript'/></script></div><div style="clear: both;font-size: 9px;text-align:center;"></div><!-- Do not remove this link -->
</div><!-- floating share bar End -->

Credits

This New Floating Social Media Buttons With Cool Hover Effect is first shared on AllBloggingTips. Bloggers are requested to link back if they are going to share above widget with there visitors.

If you face any problem in adding this floating social media buttons feel free to drop your comments. Enjoy! Peace

10 Crucial Points To Help You Write Better Blog Posts

How many times have you had killer post ideas for your blog? Tons of times, you say? So how many readers did that get your post? The problem with most bloggers is that most of them have wonderful ideas coming out of their brains at regular intervals, but when they sit down to write a post, it does not really translate into something great. We understand your frustration. This is something most bloggers feel everyday of their lives. How does one write good content? Here are 10 crucial points to remember that will help you write better blog posts.

biodegradeable-pen

  1. A lot of bloggers are guilty of ‘punching’ out their posts instead of ‘creating’  them. Yes, that’s right. It is almost as if they are under some kind of influence to write the post fast or else they will somehow miss a deadline! Don’t do that. Take time in choosing a topic that will be of interest to your niche readers. When you pick out a topic that is interesting, you have all the more chance of becoming a conversation- starter.
  1. Creating a good blog post title is very important. If you are a blogger, you can’t ignore the importance of blog post titles. It is what creates an urge in the visitors to read the whole post and it is what drives search engine results to your blog.
  1. Have a great opening line. Once a visitor has come to your blog and been interested enough to read your post, it is important that you create an opening line that will draw her in. It should be something that is interesting and which creates a desire in the reader to read the whole post.
  1. Make your blog posts matter. Just a good title and opening line will not get you far. You need to have a point that deserves a whole post being written about it. Have an opinion about something and make sure you write it.
  1. It is important that your post urges your readers to ‘do’ something. It may be as simple as asking for their opinion or something that urges them to stop indulging in corruption. Whatever it is, asking them to do something often imprints your blog to their minds.
  1. Add a certain amount of depth to each of your posts to ensure that your readers remember it.
  1. Spend time re- reading each and every post before hitting the ‘Publish’ button. Spelling and punctuation mistakes will only showcase the fact that you don’t care for your readers.
  1. If you publish your posts at the right time, it will ensure that most readers read it. Weekdays are good for publishing as a lot of people are working in their offices and often like reading new posts that come up in their readers.
  1. Promote your post in forums and other related websites.

10. Make sure you reply to comments. This will make readers feel they have added something important and they will keep coming back.

Author Bio:Rajkumar Jonnala wishes to research and find out more on desk cable management operations. His field of interest spans across wider domains and business areas. His past work experience in cable cover and cable floor cover process helps him to share the real life knowledge to his friends and readers of his blogs.

Top 10 Killer On Page SEO Techniques

Over the years On Page SEO Techniques are not as effective as Off Page SEO Techniques like Link building, Guest posting or Article marketing but still its the basic thing you need to do in order to make your blog effective and hence get free organic traffic from search engines. Google always try to improve its search results and that’s why after the Google Panda Update its looking for websites which are optimized for On Page SEO. So if you are not getting free traffic from search engines than its time for you to optimize your blog’s On Page SEO and get ready to rock the world.

seo on page

1. Use and Repeat Your Important Keywords.

The most important thing in On Page SEO is using and repeating your blog most important keywords in your articles. If you are writing quality articles but without using keywords related to your blog niche than its a waste of time. Also one should not use too many keywords over and over again in an article as this is not good for SEO. Try to maintain keyword density of 2% to 8% in an article.

2. Interlink Your Inner Pages.

Very important On Page SEO practice is that every time your write an article always try to interlink your previous articles in it. Try to inter-link 5 to 10 articles as this will not only tell search engine that your blog has some other important posts as well but its also going to help your blog readers and decrease your blog bounce rate.


3. Meta Description, Keywords and Title.

When ever some bot or human being visit your blog post the first thing they look at your post Title, Keywords or Description. These 3 attributes tells the story of your blog and one can very easily guess the content of your blog. make sure all your posts have these 3 attributes other wise you will not get traffic. For WordPress users See this Top 3 SEO Plugins which you can use in order to activate these fields.

4. Use Header Tags.

Using header tags like H1, H2, H3 in your articles also help you alot. Its better to only use H1 tag once and than use other tags for the remaining headings. H1 tag must include the main title and most important keywords of your blog.

5. Optimize Your URLs.

Optimizing your posts URL is also very important because search engines often present results on the basis of the URL. So if your blog posts URL look like these than its very difficult for search engines bots are well as for humans to understand what this URL is all about. So that better way is to customize your blog URL to some thing meaningful and keyword rich. In WordPress you can easily change the permalinks of your posts by visiting page “Settings” tab called “Permalinks”. The most popular format for permalinks is /%postname%.html

6. Canonicalize Your URLs.

Basically Canonical is the practice in which you optimize your blog URLs in order to prevent Duplications. Let me clear you that your blog can be accessed via WWW or without it. The problem is that search engine will treat these pages separately and mark them as duplicate pages which is not good SEO practice. In WordPress you can easily define which type you want by going to General Settings page. Just enter your full blog URL with or without WWW and save the settings.

7. Optimize your Images.

Images are another source of bringing free traffic towards your blog. Never name your images with only numbers like 4653.jpg or dfgj.jpg. Always try to create name with full of keywords like Nokia-Lumia-800.jpg is more readable. Also include alt tag in your images which is going to helpful for search engines.

8. Update Your blog regularly.

If you create a stunning blog with lots of interesting content but never update it than one time will come when people will not visit your blog again. Its very important that you update your blog regularly if not daily.

9. Use less Java Script Code.

I have seen many websites full of advertisements and JavaScript code which is very annoying for visitors. These codes take time to execute and hence increase the loading time of your page. If your blog’s loading time is too much than search engines may penalize you, So use only that code which is most important for you.

10. Content is King.

Not matter what you do if you are writing unique, quality and interesting articles than its very difficult for you to survive in blogosphere. Don not try to copy other, always come up with your own ideas and writing style because people love your writing style. Create some thing new with old stuff, i knew its difficult but not impossible. People who love to take challenges always succeeded in life.

Another Pure CSS3 Multi Level Drop Down Menu V3

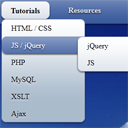
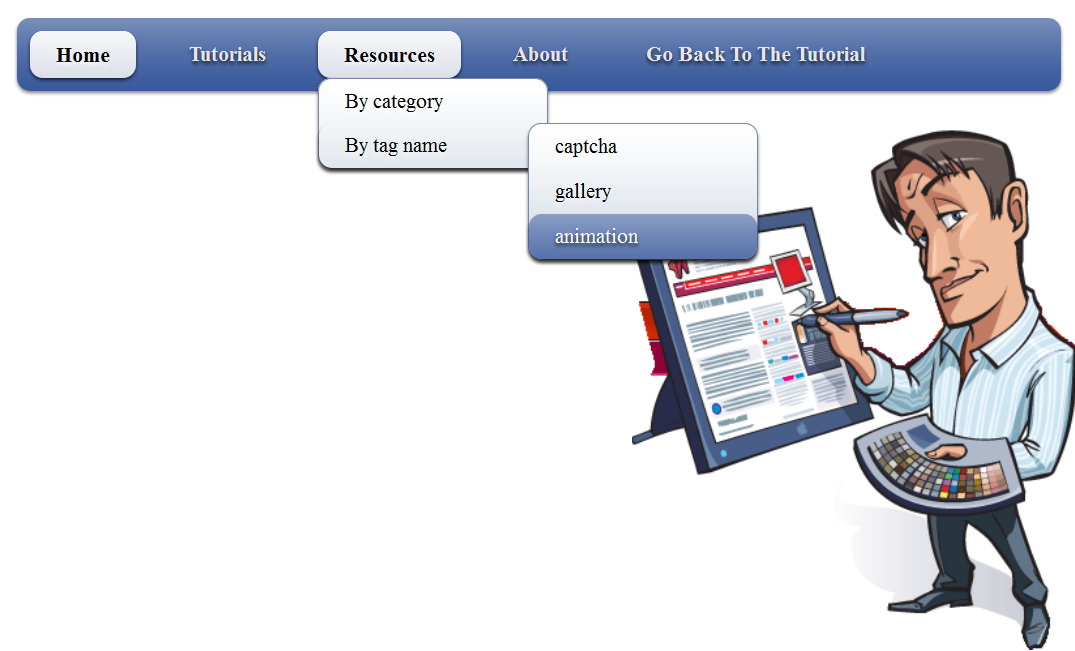
Menu v3After getting some positive comments, search engine visitors of previous Drop Down Menus V1 and Pure CSS3 Menu V3. We decided to release Another Pure CSS3 Drop Down Menu V3 For Blogger. This Multi Level Drop Down Menu is modifed version of previous css3 menu v2. I had added some cool features to this menu. This menu is a Stylish Pure CSS3 Multi Level Drop Down Menu For Blogger. It is compatible for almost all browsers like Mozilla Firefox and Google Chrome etc but the rounded corners and shadow will not be rendered properly. This Multi Level Drop Down Menu is only available on WordPress but I had converted it into Blogger users and had made installation so easy you just need to copy and paste menu code in your blogger blog widget. This Menu  is provided by Script-Tutorials guys and it is widgetized and made compatible with Blogspot blog platform by ABT.
See Also

Another Pure CSS3 Multi Level Drop Down Menu V3 Preview

drop down menu pure v3

Live Demo


Add Pure CSS3 Multi Level Drop Down Menu V3 To Blogger

Adding CSS Code

  1. Go To Blogger > Layout > Edit HTML
  2. Search For ]]></b:skin>
  3. And paste the code below just above ]]></b:skin>
/* main menu styles by AllBloggingTips */
#nav {
display:inline-block;
width:100%;
margin:0px auto;
padding:0;
background:#335599 url(http://2.bp.blogspot.com/-FVx5AvxIkpg/TzP9VsBWmrI/AAAAAAAAAVk/5D5V1QHAhOQ/s320/bg-ABT.png) repeat-x 0 -110px;border-radius:10px; /*some css3*/
-moz-border-radius:10px;
-webkit-border-radius:10px;
box-shadow:0 2px 2px rgba(0,0,0, .5);
-moz-box-shadow:0 2px 2px rgba(0,0,0, .5);
-webkit-box-shadow:0 2px 2px rgba(0,0,0, .5);
}
#nav li {
margin:10px;
float:left;
position:relative;
list-style:none;
}
#nav a {
font-weight:bold;
color:#e7e5e5;
text-decoration:none;
display:block;
padding:8px 20px;border-radius:10px; /*some css3*/
-moz-border-radius:10px;
-webkit-border-radius:10px;
text-shadow:0 2px 2px rgba(0,0,0, .7);
}/* selected menu element */
#nav .current a, #nav li:hover > a {
background:#7788aa url(http://2.bp.blogspot.com/-FVx5AvxIkpg/TzP9VsBWmrI/AAAAAAAAAVk/5D5V1QHAhOQ/s320/bg-ABT.png) repeat-x 0 -20px;
color:#000;
border-top:1px solid #f8f8f8;box-shadow:0 2px 2px rgba(0,0,0, .7); /*some css3*/
-moz-box-shadow:0 2px 2px rgba(0,0,0, .7);
-webkit-box-shadow:0 2px 2px rgba(0,0,0, .7);
text-shadow:0 2px 2px rgba(255,255,255, 0.7);
}/* sublevels */
#nav ul li:hover a, #nav li:hover li a {
background:none;
border:none;
color:#000;
}
#nav ul li a:hover {
background:#335599 url(http://2.bp.blogspot.com/-FVx5AvxIkpg/TzP9VsBWmrI/AAAAAAAAAVk/5D5V1QHAhOQ/s320/bg-ABT.png) repeat-x 0 -100px;
color:#fff;border-radius:10px; /*some css3*/
-moz-border-radius:10px;
-webkit-border-radius:10px;
text-shadow:0 2px 2px rgba(0,0,0, 0.7);
}#nav ul li:first-child > a {
-moz-border-radius-topleft:10px; /*some css3*/
-moz-border-radius-topright:10px;
-webkit-border-top-left-radius:10px;
-webkit-border-top-right-radius:10px;
}
#nav ul li:last-child > a {
-moz-border-radius-bottomleft:10px; /*some css3*/
-moz-border-radius-bottomright:10px;
-webkit-border-bottom-left-radius:10px;
-webkit-border-bottom-right-radius:10px;
}/* drop down */
#nav li:hover > ul {
opacity:1;
visibility:visible;
}
#nav ul {
opacity:0;
visibility:hidden;
padding:0;
width:175px;
position:absolute;
background:#aabbcc url(http://2.bp.blogspot.com/-FVx5AvxIkpg/TzP9VsBWmrI/AAAAAAAAAVk/5D5V1QHAhOQ/s320/bg-ABT.png) repeat-x 0 0;
border:1px solid #7788aa;border-radius:10px; /*some css3*/
-moz-border-radius:10px;
-webkit-border-radius:10px;
box-shadow:0 2px 2px rgba(0,0,0, .5);
-moz-box-shadow:0 2px 2px rgba(0,0,0, .5);
-webkit-box-shadow:0 2px 2px rgba(0,0,0, .5);-moz-transition:opacity .25s linear, visibility .1s linear .1s;
-webkit-transition:opacity .25s linear, visibility .1s linear .1s;
-o-transition:opacity .25s linear, visibility .1s linear .1s;
transition:opacity .25s linear, visibility .1s linear .1s;
}
#nav ul li {
float:none;
margin:0;
}
#nav ul a {
font-weight:normal;
text-shadow:0 2px 2px rgba(255,255,255, 0.7);
}
#nav ul ul {
left:160px;
top:0px;
}


Adding HTML of Menu

  1. Go To Blogger > Design
  2. Click choose a gadget
  3. Select HTML/javascript widget
  4. Paste the following code inside it
    <ul id="nav">
        <li><a href="#">Home</a></li>
        <li><a href="#">Tutorials</a>
            <ul>
                <li><a href="#">HTML / CSS</a></li>
                <li><a href="#">JS / jQuery</a>
                    <ul>
                        <li><a href="#">jQuery</a></li>
                        <li><a href="#">JS</a></li>
                    </ul>
                </li>
                <li><a href="#">PHP</a></li>
                <li><a href="#">MySQL</a></li>
                <li><a href="#">XSLT</a></li>
                <li><a href="#">Ajax</a></li>
            </ul>
        </li>
        <li><a href="#">Resources</a>
            <ul>
                <li><a href="#">By category</a>
                    <ul>
                        <li><a href="#">PHP</a></li>
                        <li><a href="#">MySQL</a></li>
                        <li><a href="#">XSLT</a></li>
                        <li><a href="#">Ajax</a></li>
                    </ul>
                </li>
                <li><a href="#">By tag name</a>
                    <ul>
                        <li><a href="#">captcha</a></li>
                        <li><a href="#">gallery</a></li>
                        <li><a href="#">animation</a></li>
                    </ul>
                </li>
            </ul>
        </li>
        <li><a href="#">About</a></li>
        <li><a href="http://www.allbloggingtips.com">Go Back To The Tutorial</a></li>
    </ul>

Now kindly make these customization changes to add your own links to menu:

  • Each TAB can be edited by directly understanding the following HTML code,

<li><a href=”#“>TAB TEXT</a></li>

In each case replace the hash sign (#) with your page URL or link and replace the text with your page title. I have kept the page titles unchanged in the code above so that you could easily edit them by seeing the demo.


Credits

This Another Pure CSS3 Multi Level Drop Down Menu V3 For Blogger is first shared on AllBloggingTips. Bloggers are requested to link back if they are going to share above widget with there visitors.

Confused or Need Help?

If you need some extra help in removing rows or columns then please feel free to post your questions. You can discus it as much with me as possible. This will help others to better understand on how to make further changes. :D