WordPress Widgets

Another Stylish Mashable Style Subscription Widget v2

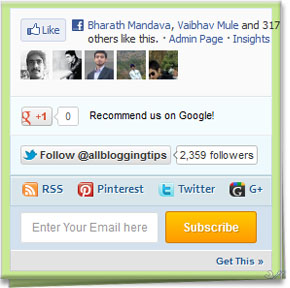
Another Stylish Mashable Style Subscription Widget v2Recently we shared Mashable Style Subscription Widget v1 with you. Lots of our readers found this great widget. Some asked us to improve this and add some more cool features with more social profile likes like Pinterest, Facebook, Twitter, RSS.You can add Mashable Style Subscription Widget to your wordpress or blogger/blogspot blogs easily.  Mashable Style Social Subscription Widget v 2.0 is an attractive subscription form that will further increase the number of your Email subscribers. To Check demo copy and paste given below to our html editor

Features Of New Mashable Subscription Widget v2

  1. Facebook Likebox
  2. Recommend us on google+ button
  3. Twitter Follow us Badge
  4. Social Icons like RSS, Pinterest, Twitter and Google+
  5. Feedburner Subscription Widget

Live Demo

Adding New Mashable Style Social Subscription Widget

You just need to place a code to your blog widget Follow following steps to add New Mashable Style Social Subscription Widget to WordPress and Blogger.

Adding To Blogger

  1. Go to Design > Page Elements.
  2. Click Add A Gadget.
  3. In Add A Gadget window, select HTML/Javascript .
  4. Copy the code below and paste it inside the content box.
  5. Save the gadget.
  6. Drag the gadget and reposition it under Blog Posts gadget.
  7. Click Save button (top right hand corner).

Adding To WordPress

  1. Go to Dashboard > Appearance > Widgets > Available Widgets.
  2. Drag Text widget into a sidebar.
  3. Paste in the code.
  4. Save.

Download Code Here!

After download and pasting code kindly Make these important changes:

  • Replace AllBloggingTips with your Facebook , Twitter, Google+ and Pinterest ID
  • Replace AllBloggingTips with your feedburner  link.
  • Replace Google+Profile Link with your Google Plus profile link

5.   Hit save and you are all done!

Visit your blogs to see it working just perfectly.  if not drop comment below with problem and screenshot ;)

I have set the width of the widget to 270px. If in case your sidebar is small or big, you may then have to adjust the two width values in brown highlight color. The first will set the width of the entire container and the second value will set the width of the subscription input box.

Credits:

You are most welcomed to share this widget with your readers. You will have to give credits to AllBloggingTips blog by attaching a link back to this post. You may also give credits to the author for the wordpress version of this sharing plugin. :D

jQuery Popup For Facebook Like Box With Timer

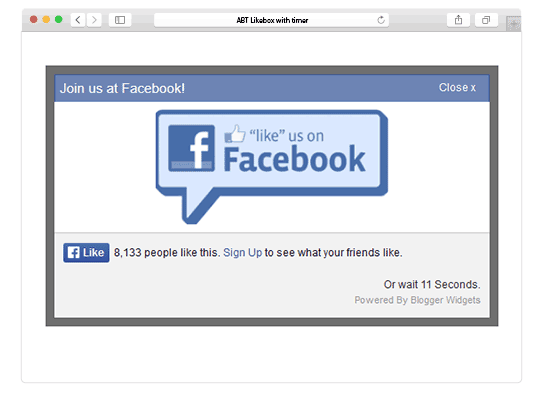
FACEBOOK LIKE BOX WITH TIMER
You have created Facebook page of your blog.

But what about page likes?

Do you just keep waiting for likes to come to your page itself?

Ofcourse not, you’ve to follow proper methods to get likes to your facebook pages.

It’s recommended to use some type of Facebook like box on your blogs and encourage users to like your page.

Facebook has always become a useful and resourceful site to every bloggers. Today I brought a new stylish facebook popup like box with timer. It is a beautiful facebook like box popup with timer.

Stylish & Cute Subscription Form Widget For Blogs

subscribe box v1 demo abtMost of peoples want simple, clean yet Stylish and Cute Subscription Form for their WordPress and Blogger/blogspot Blogs. Today we came with Stylish and Cute Subscription Form Widget  For Blogs , Easy to edit subscription form dozed with new CSS effects. This widget will keep your sidebar neat and clean and will surely attract visitors to subscribe. Follow following steps to add this Stylish and Cute Subscription Form Widget to WordPress and Blogspot
 TipCopy the code given below and paste it inside this editor to see a live demo.

Live Demo

Adding Stylish and Cute Subscription Form Widget

You just need to place a code to your blog widget Follow following steps to add Stylish and Cute Subscription Form Widget to WordPress and Blogger.

Adding To Blogger

  1. Go to Design > Page Elements.
  2. Click Add A Gadget.
  3. In Add A Gadget window, select HTML/Javascript .
  4. Copy the code below and paste it inside the content box.
  5. Save the gadget.
  6. Drag the gadget and reposition it under Blog Posts gadget.
  7. Click Save button (top right hand corner).

Adding To WordPress

  1. Go to Dashboard > Appearance > Widgets > Available Widgets.
  2. Drag Text widget into a sidebar.
  3. Paste in the code.
  4. Save.
Note: If This widget is not working on you blogspot and wordpress blogs then download this code  and place it as a widget nstead of give below.
 <style>
.abt-email{
background:url(https://lh3.googleusercontent.com/-3mMr7bVkJEA/T2mKAcZEBkI/AAAAAAAAAZI/IWMC_nG_foU/h120/service-email.jpg) no-repeat -8px 10px ;
width:240px;
padding:10px 0 0 65px;
float:left;
font-size:1.2em;
font-weight:bold;
margin:0 0 10px 0;
color:#0084CE;
box-shadow: 1px 1px 5px 1px #eee;
-moz-border-radius:10px;
-webkit-border-radius:10px;
border-radius:10px;
}

.abt-emailsubmit{
background:#9B9895;
cursor:pointer;
color:#fff;
border:none;
padding:4.4px;
text-shadow:0 -1px 1px rgba(0,0,0,0.25);
-moz-border-radius:6px;
-webkit-border-radius:6px;
border-radius:6px;
font:12px sans-serif; box-shadow:inset 4px 4px 3px rgba(0,0,0,0.1);

}
.abt-emailsubmit:hover{
background:#0084CE; box-shadow:inset 8px 8px 6px rgba(0,0,0,0.1);
}
.textarea{background: #fff !important;box-shadow:inset 4px 4px 3px rgba(0,0,0,0.1);
border: 1px solid #d2d2d2;
padding: 0px 8px 0px 8px;
color: #888; font-size: 12px;
height: 25px; width: 165px;
border-radius: 5px;
-moz-border-radius: 5px;
-webkit-border-radius: 5px;
margin:0px; }

</style>

<div class='abt-email'>
Subscribe via Email
<form action="http://feedburner.google.com/fb/a/mailverify" id="feedform" method="post" target="popupwindow" onsubmit="window.open('http://feedburner.google.com/fb/a/mailverify?uri=AllBloggingTips', 'popupwindow', 'scrollbars=yes,width=550,height=520');return true">
<input gtbfieldid="3" class="textarea" name="email" onblur="if (this.value == &quot;&quot;) {this.value = &quot;Enter email address here&quot;;}" onfocus="if (this.value == &quot;Enter email address here&quot;) {this.value = &quot;&quot;;}" value="Enter email address here" type="text" />
<input type="hidden" value="AllBloggingTips" name="uri"/><input type="hidden" name="loc" value="en_US"/>
<input class="abt-emailsubmit" value="Submit" type="submit" />
</form> 

</div>

Now make these changes,

  • Now replace AllBloggingTips with your Feedburner Email Feed link. You can get it by visiting your feedburner account then navigate to Publicize and then to Email Subscriptions.
  • Replace AllBloggingTips with your feed title. It appear at the end of your feed link. In my case it is AllBloggingTips

Save your widget and view your blog to see it showcasing live! :)

That’s All!

Do let me know if you needed any help in customizing the widget.

New Mashable Style Social Subscription Widget

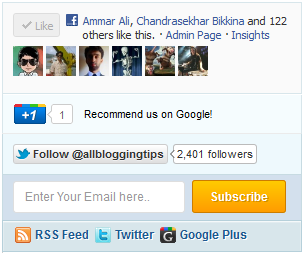
Today we comes with New Mashable Style Social Subscription Widget.  You can add this to your wordpress or blogger/blogspot blogs. It includes Like Button, Google+, Twitter follower with a cool subscribe box. New Mashable Style Social Subscription Widget an attractive subscription form that will further increase the number of your Email subscribers. The conversion didn’t took me very long and I am pleased to present it to all of you. Kindly see a demo first:
 Live Demo

Adding New Mashable Style Social Subscription Widget

You just need to place a code to your blog widget Follow following steps to add New Mashable Style Social Subscription Widget to WordPress and Blogger.

Adding To Blogger

  1. Go to Design > Page Elements.
  2. Click Add A Gadget.
  3. In Add A Gadget window, select HTML/Javascript .
  4. Copy the code below and paste it inside the content box.
  5. Save the gadget.
  6. Drag the gadget and reposition it under Blog Posts gadget.
  7. Click Save button (top right hand corner).

Adding To WordPress

  1. Go to Dashboard > Appearance > Widgets > Available Widgets.
  2. Drag Text widget into a sidebar.
  3. Paste in the code.
  4. Save.

Note: If This widget is not working on you blogspot and wordpress blogs then download this code   and place it as a widget nstead of give below.

<style>
    /* Social Widget */
    #ABT-mashable-bar {
        border: 0;
        margin-bottom: 10px;
        margin: 0 auto;
            width:300px;
    }
    .fb-likebox {
        background: #fafafa;
        padding: 10px 10px 0 10px;
        border: 1px solid #D8E6EB;
        margin-top: -2px;
            height:80px;
    }
    .googleplus {
        background: #F5FCFE;
        border-top: 1px solid #FFF;
        border-bottom: 1px solid #ebebeb;
        border-right: 1px solid #D8E6EB;
        border-left: 1px solid #D8E6EB;
        border-image: initial;
        font-size: .90em;
        font-family: "Arial","Helvetica",sans-serif;
        color: #000;
        padding: 9px 11px;
        line-height: 1px;}
    .googleplus span {
        color: #000;
        font-size: 11px;
        position: absolute;
        display:inline-block;
        margin: 9px 70px;}
    .g-plusone {    float: left;}
    .twitter {
        background: #EEF9FD;
        padding: 10px;
        border: 1px solid #C7DBE2;
        border-top: 0;}
    #mashable {
        background: #EBEBEB;
        border: 1px solid #CCC;
        border-top: 1px solid white;
        padding: 2px 8px 2px 3px;
        text-align: right;
        border-image: initial;}
    #mashable .author-credit {}
    #mashable .author-credit a {
        font-size: 10px;
        font-weight: bold;
        text-shadow: 1px 1px white;
        color: #1E598E;
        text-decoration:none;}
    #email-news-subscribe .email-box{
        padding: 5px 10px;
        font-family: "Arial","Helvetica",sans-serif;
        border-top: 0;
        border-right: 1px solid #C7DBE2;
        border-left: 1px solid #C7DBE2;         background: #d3e0ed;
        border-image: initial;
       height:35px;}
    #email-news-subscribe .email-box input.email{
        background:#FFFFFF;
        border: 1px solid #dedede;
        color: #999;
        padding: 7px 10px 8px 10px;
        -moz-border-radius: 3px;
        -webkit-border-radius: 3px;
        -o-border-radius: 3px;
        -ms-border-radius: 3px;
        -khtml-border-radius: 3px;
        border-radius: 3px;
        border-image: initial;
        font-family: "Arial","Helvetica",sans-serif;}
    #email-news-subscribe .email-box input.email:focus{color:#333}
    #email-news-subscribe .email-box input.subscribe{
        background: -moz-linear-gradient(center top,#FFCA00 0,#FF9B00 100%);
        background: -webkit-gradient(linear,left top,left bottom,color-stop(0,#FFCA00),color-stop(1,#FF9B00));
        background: -moz-linear-gradient(center top,#FFCA00 0,#FF9B00 100%);
        -pie-background: linear-gradient(270deg,#ffca00,#ff9b00);
        font-family: "Arial","Helvetica",sans-serif;
        border-radius:3px;
        -moz-border-radius:3px;
        -webkit-border-radius:3px;
        border:1px solid #cc7c00;
        color:white;
        text-shadow:#d08d00 1px 1px 0;
        padding:7px 14px;
        margin-left:3px;
        font-weight:bold;
        font-size:12px;
        cursor:pointer;
        border-image: initial;}
    #email-news-subscribe .email-box input.subscribe:hover{
        background: #ff9b00;
        background-image:-moz-linear-gradient(top,#ffda4d,#ff9b00);
        background-image:-webkit-gradient(linear,left top,left bottom,from(#ffda4d),to(#ff9b00));
        filter:progid:DXImageTransform.Microsoft.Gradient(startColorStr=#ffffff,endColorStr=#ebebeb);
        outline:0;-moz-box-shadow:0 0 3px #999;
        -webkit-box-shadow:0 0 3px #999;
        box-shadow:0 0 3px #999
        background:-webkit-gradient(linear,left top,left bottom,color-stop(0,#ffda4d),color-stop(1,#ff9b00));
        background:-moz-linear-gradient(center top,#ffda4d 0,#ff9b00 100%);
        -pie-background:linear-gradient(270deg,#ffda4d,#ff9b00);
        border-radius:3px;
        -moz-border-radius:3px;
        -webkit-border-radius:3px;
        border:1px solid #cc7c00;
        color:#FFFFFF;
        text-shadow:#d08d00 1px 1px 0}
    #other-social-bar {
        background-color: #D8E6EB;
        box-shadow: 0 1px 1px #FFFFFF inset;
        padding: 0px;
        font-family: "Arial","Helvetica",sans-serif;
        font-weight:bold;
        overflow: hidden;
        border: 1px solid #B6D0DA;
           height:30px;
    }
    #other-social-bar ul {list-style: none outside none; padding-left: 4px;}
    #other-social-bar .other-follow {
        float: left;
        color:#1E598E;
        overflow: hidden;
        height:20px;
        padding:7px;
        width: 270px;}
    #other-social-bar .other-follow ul {
        list-style: none outside none;
        padding-left: 4px;}
    #other-social-bar .other-follow ul li {
        font-size: 12px;
        font-weight: bold;
        display:inline;
        border:0;
        text-shadow: 1px 1px white;}
    #other-social-bar .other-follow ul li a {
        font-size: 12px;
        color:#1E598E;
        font-weight: bold;
        display:inline;
        text-shadow: 1px 1px white;}
    #other-social-bar .other-follow li {
        font-size: 12px;
        font-weight: bold;
        display:inline;
        border:0;
        text-shadow: 1px 1px white;}
    #other-social-bar .other-follow li a {
        font-size: 12px;
        color:#1E598E;
        font-weight: bold;
        display:inline;
        text-shadow: 1px 1px white;}
    #other-social-bar .other-follow li.my-rss {
        background: url('http://3.bp.blogspot.com/-sR72SM_Wets/TwHZG9y4hXI/AAAAAAAAFv8/0bP2R3Qkl8c/s400/rss-16x16.png') no-repeat transparent;
        line-height: 1;
        padding: 0px 3px 1px 20px;
        width: 60px;
        margin-bottom:0px;
            margin-left:5px;}

    #other-social-bar .other-follow li.my-rss a, #other-social-bar .other-follow li.my-linkedin a, #other-social-bar .other-follow li.my-gplus a{
    text-decoration:none;
    }

    #other-social-bar .other-follow li.my-rss a:hover, #other-social-bar .other-follow li.my-linkedin a:hover, #other-social-bar .other-follow li.my-gplus a:hover{
    text-decoration:underline;
    }

    #other-social-bar .other-follow li.my-linkedin {
        background: url('http://madbaydesigns.com/shop/images/social_bookmarks/twitter.png') no-repeat transparent;
        line-height: 1;
        padding: 0px 3px 1px 20px;
        width: 60px;
        margin-bottom:0px;}
    #other-social-bar .other-follow li.my-gplus {
        background: url(http://4.bp.blogspot.com/-cC729VpBxrk/TwHZE71ZgoI/AAAAAAAAFvk/_UMyIgA8vj8/s400/gplus-16x16.png) no-repeat transparent;
        line-height: 1;
        width: 60px;
        padding: 0px 3px 1px 20px;
        margin-bottom:0px;}

    </style>

    <!--[if IE]>

    <style>
    #email-news-subscribe .email-box input.subscribe{
        background: #FFCA00;
        }
    </style>

    <![endif]-->

    <!--begin of social widget--> <div style="margin-bottom:10px;"> <div id="ABT-mashable-bar" > <!-- Begin Widget --> <div> <!-- Facebook --> <iframe src="//www.facebook.com/plugins/like.php?href=http://facebook.com/allbloggingtips&amp;send=false&amp;layout=standard&amp; width=200px&amp;show_faces=true&amp;action=like&amp;colorscheme=light&amp;

    font&amp;height=100px&amp;appId=234513819928295" scrolling="no" frameborder="0" style="border:none; overflow:hidden; "></iframe> </div> <div> <!-- Google --> <span>Recommend us on Google!</span><div data-size="medium"></div> <script type="text/javascript" src="https://apis.google.com/js/plusone.js"></script> </div> <div> <!-- Twitter --> <iframe title="" style="width: 300px; height: 20px;" src="http://platform.twitter.com/widgets/follow_button.html#_=1319978796351&amp;

    align=&amp;button=blue&amp;id=twitter_tweet_button_0&amp;

    lang=en&amp;link_color=&amp;screen_name=allbloggingtips&amp;show_count=&amp;

    show_screen_name=&amp;text_color=" frameborder="0" scrolling="no"></iframe> </div> 

 <div id="email-news-subscribe"> <!-- Email Subscribe --> <div>

    <form action="http://feedburner.google.com/fb/a/mailverify" method="post" target="popupwindow" onsubmit="window.open('http://feedburner.google.com/fb/a/mailverify?uri=tntbystc', 'popupwindow', 'scrollbars=yes,width=550,height=520');return true">
            <input type="text" style="width: 150px; font-size: 12px;" id="email" name="email" value="Enter Your Email here.." onfocus="if(this.value==this.defaultValue)this.value=&#39;&#39;;" onblur="if(this.value==&#39;&#39;)this.value=this.defaultValue;" />
            <input type="hidden" value="tntbystc" name="uri" />
            <input type="hidden" name="loc" value="en_US" />
            <input name="commit" type="submit" value="Subscribe" />
        </form>

    </div> </div>

<div id="other-social-bar"> <!-- Other Social Bar --> <ul> <li> <a rel="nofollow" title="RSS" href="http://feeds.feedburner.com/allbloggingtips" target="_blank">RSS Feed</a> </li> <li> <a rel="nofollow" title="linkedin" rel="author" href="AllBloggingtips" target="_blank">Twitter</a> </li> <li> <a rel="nofollow" title="Google Plus" rel="author" href="http://plus.google.com/44448117245314564536" target="_blank">Google Plus</a> </li> </ul> </div><div id="mashable" style="background: #e3e3e3;border: 1px solid #CCC;border-top: 1px solid white;padding: 1px 8px 1px 3px;text-align: right;border-image: initial;font-size:10px;font-family: "arial","helvetica",sans-serif;"> <span style="font-family: Arial, Helvetica, sans-serif;"></span></div></div>
    <!-- End Widget --> </div> <!--end of social widget-->

Make these important changes:

  • Replace AllBloggingTips with your Facebook username
  • Replace AllBloggingTips with your twitter username
  • Replace AllBloggingTips with your Feedburner title. Your Feedburner title is the word added at the end of your Feedburner link. Example: Allbloggingtips
  • Replace AllBloggingTips with your feedburner  link.
  • Replace Allbloggingtips with your Twitter profile link
  • Replace Google+Profile Link with your Google Plus profile link

5.   Hit save and you are all done!

Visit your blogs to see it working just perfectly. :)

I have set the width of the widget to 290px. If in case your sidebar is small or big, you may then have to adjust the two width values in brown highlight color. The first will set the width of the entire container and the second value will set the width of the subscription input box.

Credits:

You are most welcomed to share this widget with your readers. You will have to give credits to AllBloggingTips blog by attaching a link back to this post. You may also give credits to the author for the wordpress version of this sharing plugin.

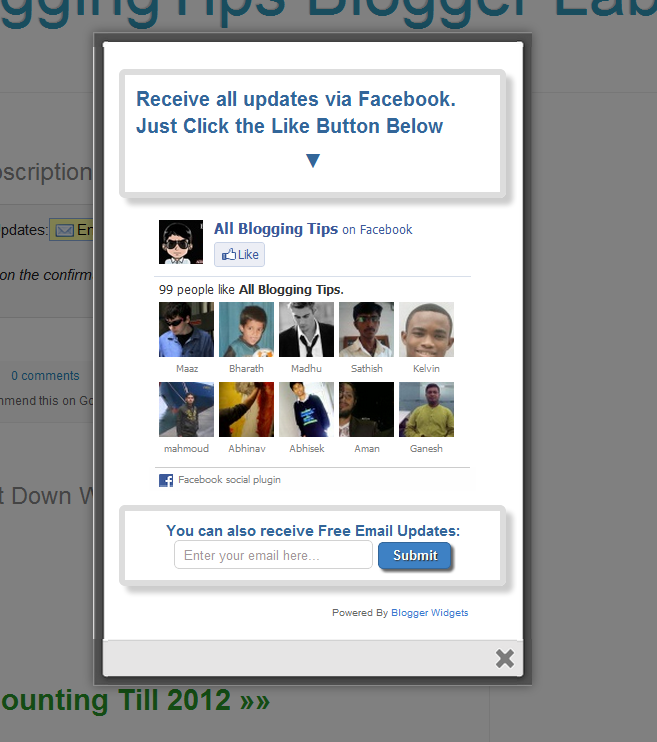
Another Cool jQuery Popup For Facebook Like Box – v2

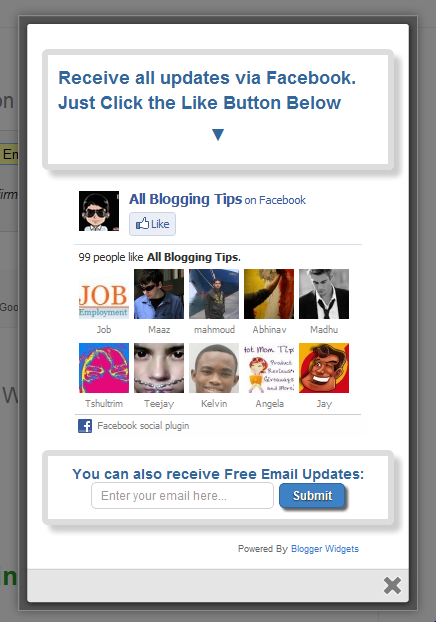
jQuery Popup For Facebook Like BoxAfter our previous Cute jQuery Popup For Facebook Like Box.  We decided to release Another Cool jQuery Popup For Facebook Like Box – v2. This is a great widget to increase likes. You may see on most sites or blogs which are using Popups to increase there subscribers, fans and followers.  As soon as new visitors arrive your blog the popup will be showed to your visitors which can help you to increase likes and get more traffic from Facebook.

Check out demo below and than I show you How to Add Another Cool jQuery Popup For Facebook Like Box – v2  in Blogger or WordPress?

Live Demo

How To Another Cool jQuery Popup For Facebook Like Box – v2

I am discussing here steps for WordPress and Blogger but if you know how to deal simple HTML code then you can easily add it to your any blog too.

Adding To Blogger

  1. Go to Design > Page Elements.
  2. Click Add A Gadget.
  3. In Add A Gadget window, select HTML/Javascript .
  4. Copy the code below and paste it inside the content box.
  5. Save the gadget.
  6. Drag the gadget and reposition it under Blog Posts gadget.
  7. Click Save button (top right hand corner).

Adding To WordPress

  1. Go to Dashboard > Appearance > Widgets > Available Widgets.
  2. Drag Text widget into a sidebar.
  3. Paste in the code.
  4. Save.


Download Code Here!

Make this simple change:

  • Replace allbloggingtips with your facebook username.
  • Replace latestbloggingtips4u with your feedburner name

Are you Want the widget to appear Repeatedly

If you want to prompt the likebox every time the visitor enters your blog then simply delete this *30 from the code above.
Visit your blog to see Facebook popup. To review the widget again and again just delete your browser cookies and refresh the page to see it appearing again. That’s it a cool Facebook pop up widget that will surly increase your facebook fan count.Thanks again to MBT for the original gadget.

jQuery Popup For Facebook Like Box

Need Help?

I hope that all unanswered queries on the previous tutorial are covered in this post. If you still need help in changing colors and other stuff then you are most welcomed to post your queries below. Have a nice day pals! )