
Now you can easily Add Navigation Menu in Blogger with ease. Smooth Navigation Menu is a multi level, CSS list based menu powered using jQuery that makes website navigation a smooth and that’s a good thing given the important role of this element in any site.
Steps to Add Smooth Multi Level Drop-Down Menu In Blogger
Note: Before making any changes to your template, take a full backup of your blogger template.
#Step 1. Log in to your Blogger Dashboard and Navigate to Design > Edit HTML.

#Step 2. Find this code:</head> and replace it wit this code:
<link href=’https://sites.google.com/site/addinblogger/how-to-add-in-blogger/ddsmoothmenu-v.css’ rel=’stylesheet’ type=’text/css’/>
<script src=’http://ajax.googleapis.com/ajax/libs/jquery/1.2.6/jquery.min.js’ type=’text/javascript’/>
<script src=’https://sites.google.com/site/addinblogger/how-to-add-in-blogger/ddsmoothmenu.js’ type=’text/javascript’>
/***********************************************
* Smooth Navigational Menu- (c) Dynamic Drive DHTML code library (www.dynamicdrive.com)
* This notice MUST stay intact for legal use
* Visit Dynamic Drive at http://www.dynamicdrive.com/ for full source code
***********************************************/
</script>
<script type=’text/javascript’>
ddsmoothmenu.init({
mainmenuid: “smoothmenu1”, //menu DIV id
orientation: ‘h’, //Horizontal or vertical menu: Set to “h” or “v”
classname: ‘ddsmoothmenu’, //class added to menu’s outer DIV
//customtheme: [“#1c5a80”, “#18374a”],
contentsource: “markup” //”markup” or [“container_id”, “path_to_menu_file”]
})
ddsmoothmenu.init({
mainmenuid: “smoothmenu2”, //Menu DIV id
orientation: ‘v’, //Horizontal or vertical menu: Set to “h” or “v”
classname: ‘ddsmoothmenu-v’, //class added to menu’s outer DIV
//customtheme: [“#804000”, “#482400”],
contentsource: “markup” //”markup” or [“container_id”, “path_to_menu_file”]
})
</script>
</head>
#Step 3. Now navigate to Design > Page Element and click on Add a Gadget > HTML/Javascript and insert the following code and click Save button.

<div id=”smoothmenu1″>
<ul>
<li><a href=”http://bloggerhowtotips.blogspot.com/”>Blogger How To Tips</a></li>
<li><a href=”#”>Folder 0</a>
<ul>
<li><a href=”#”>Sub Item 1.1</a></li>
<li><a href=”#”>Sub Item 1.2</a></li>
<li><a href=”#”>Sub Item 1.3</a></li>
<li><a href=”#”>Sub Item 1.4</a></li>
<li><a href=”#”>Sub Item 1.2</a></li>
<li><a href=”#”>Sub Item 1.3</a></li>
<li><a href=”#”>Sub Item 1.4</a></li>
</ul>
</li>
<li><a href=”#”>Folder 1</a>
<ul>
<li><a href=”#”>Sub Item 1.1</a></li>
<li><a href=”#”>Sub Item 1.2</a></li>
<li><a href=”#”>Sub Item 1.3</a></li>
<li><a href=”#”>Sub Item 1.4</a></li>
<li><a href=”#”>Sub Item 1.2</a></li>
<li><a href=”#”>Sub Item 1.3</a></li>
<li><a href=”#”>Sub Item 1.4</a></li>
</ul>
</li>
<li><a href=”#”>Item 3</a></li>
<li><a href=”#”>Folder 2</a>
<ul>
<li><a href=”#”>Sub Item 2.1</a></li>
<li><a href=”#”>Folder 2.1</a>
<ul>
<li><a href=”#”>Sub Item 2.1.1</a></li>
<li><a href=”#”>Sub Item 2.1.2</a></li>
<li><a href=”#”>Folder 3.1.1</a>
<ul>
<li><a href=”#”>Sub Item 3.1.1.1</a></li>
<li><a href=”#”>Sub Item 3.1.1.2</a></li>
<li><a href=”#”>Sub Item 3.1.1.3</a></li>
<li><a href=”#”>Sub Item 3.1.1.4</a></li>
<li><a href=”#”>Sub Item 3.1.1.5</a></li>
</ul>
</li>
<li><a href=”#”>Sub Item 2.1.4</a></li>
</ul>
</li>
</ul>
</li>
<li><a href=”https://allbloggingtips.com/”>All Blogging Tips</a></li>
</ul>
<br style=”clear: left” />
</div>
<h2 style=”margin-top:200px”>Example 2</h2>
<div id=”smoothmenu2″>
<ul>
<li><a href=”https://allbloggingtips.com/”>Blogger Tips and Tricks</a></li>
<li><a href=”#”>Folder 0</a>
<ul>
<li><a href=”#”>Sub Item 1.1</a></li>
<li><a href=”#”>Sub Item 1.2</a></li>
<li><a href=”#”>Sub Item 1.3</a></li>
<li><a href=”#”>Sub Item 1.4</a></li>
<li><a href=”#”>Sub Item 1.2</a></li>
<li><a href=”#”>Sub Item 1.3</a></li>
<li><a href=”#”>Sub Item 1.4</a></li>
</ul>
</li>
<li><a href=”#”>Folder 1</a>
<ul>
<li><a href=”#”>Sub Item 1.1</a></li>
<li><a href=”#”>Sub Item 1.2</a></li>
<li><a href=”#”>Sub Item 1.3</a></li>
<li><a href=”#”>Sub Item 1.4</a></li>
<li><a href=”#”>Sub Item 1.2</a></li>
<li><a href=”#”>Sub Item 1.3</a></li>
<li><a href=”#”>Sub Item 1.4</a></li>
</ul>
</li>
<li><a href=”#”>Item 3</a></li>
<li><a href=”#”>Folder 2</a>
<ul>
<li><a href=”#”>Sub Item 2.1</a></li>
<li><a href=”#”>Folder 2.1</a>
<ul>
<li><a href=”#”>Sub Item 2.1.1</a></li>
<li><a href=”#”>Sub Item 2.1.2</a></li>
<li><a href=”#”>Folder 3.1.1</a>
<ul>
<li><a href=”#”>Sub Item 3.1.1.1</a></li>
<li><a href=”#”>Sub Item 3.1.1.2</a></li>
<li><a href=”#”>Sub Item 3.1.1.3</a></li>
<li><a href=”#”>Sub Item 3.1.1.4</a></li>
<li><a href=”#”>Sub Item 3.1.1.5</a></li>
</ul>
</li>
<li><a href=”#”>Sub Item 2.1.4</a></li>
</ul>
</li>
</ul>
</li>
<li><a href=”https://allbloggingtips.com/”>All Blogspot Tips</a></li>
</ul>
<br style=”clear: left” />
</div>
#Step 4. Save template and done!.

After adding the menu your blog layout will be look like in image above, as usual if you have any doubt please comment.
Credits
Above smooth multi level drop-down menu is powered by DynamicDrive. See this link for more customization: http://www.dynamicdrive.com/dynamicindex1/ddsmoothmenu.htm
 We all are similar with Facebook Like Box and also how important they are to increase followers or likes. Cool Twitter Follower Box Widget Also works just like facebook like box. This will help you to increase twitter followers and get better position in twitter. The code for this Fan box is created by
 We also know that how important are visitors for us. But how to interact with them? There are many ways like adding a contact me link to footer, sidebar or in navigation menu. But adding floating contact me button is best choice. This will help your visitors to easily find contact button. Adding Floating Contact Me Button is best way to interact with your visitors and make them love your blog. Now You can Add Floating Contact Me Button To Blogger. You just need to place below code just after <body> to add floating button and link it to your contact me page.
 The year of 2011 will be over soon, and We countdown to welcome the year of 2012, to say a Happy New Year 2012 with a new spirit, the new breakthrough for everything to be better, yes we hope so. I now comes with Happy New Year 2012 Balloons Widget. It is just like we have posted for
 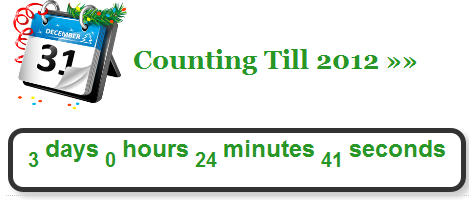 First of all I would like to wishes you Happy New Year 2012. I now comes with a cool New Year CountDown Widget For Blogger And WordPress Blogs for all Muslims, Christian and others. The countdown widget counts down to 31 December 2011 and in military time format by counting days, hours, minutes and seconds left for the coming New Year 2012 event. It also alerts and wishes New Year 2012 by generating a pop-up once the count down ends.