4 Ways To Customize Feedburner Email Subscription Form

Feedburner Email Subscription is a great service to distribute your blog articles to your feed readers. It is free, fast and best ever because its FREE. However the default Feedburner Email Subscription Form may looks too simple, old or may not match your website design.

4 Ways To Customize Feedburner Email Subscription Form

Here are 4 Ways To Customize Feedburner Email Subscription Form. First go and get your default Feedburner Email Subscription Form here. By default it looks like this.

<form style=”border:1px solid #ccc;padding:3px;text-align:center;” action=”http://feedburner.google.com/fb/a/mailverify” method=”post” target=”popupwindow” onsubmit=”window.open(‘http://feedburner.google.com/fb/a/mailverify?uri=Your Feed ID’, ‘popupwindow’, ‘scrollbars=yes,width=550,height=520’);return true”><p>Enter your email address:</p><p><input type=”text” style=”width:140px” name=”email”/></p><input type=”hidden” value=”Your Feed ID” name=”uri”/><input type=”hidden” name=”loc” value=”en_US”/><input type=”submit” value=”Subscribe” /><p>Delivered by <a href=”http://feedburner.google.com” target=”_blank”>FeedBurner</a></p></form>

1. Add or Change Background Colour on FeedBurner Email Subscription Form

Add background color to feedburner
Add the background image code (e.g. background: url(http://www.example.com/image.jpg)) right after text-align:center;
So the code would be:-
<form style="border:1px solid #ccc;padding:3px;text-align:center;background: url(http://www.example.com/image.jpg);"
You can change the image URL to add your own.

2. Change the Width and Height of the Text Box


Adjust the width of the text box width:140px to your requirements.
<input type="text" style="width:140px" name="email"/>
You can change with your desire width.

If you want to change the height of the text box, simply add height:20px right after width:140px and adjust the height to your requirements.
<input type="text" style="width:140px;height:20px;" name="email"/>
You can change with your desire height.

3. Add or Change Background Image on FeedBurner Email Subscription Form

Add background image to feedburner
Add the background image code (e.g. background: url(http://www.example.com/image.jpg)) right after text-align:center;
So the code would be:-
<form style="border:1px solid #ccc;padding:3px;text-align:center;background: url(http://www.example.com/image.jpg);"
You can change the image URL to add your own.

4. Add Default Text in the Text Box

Add text in Feedburner
You can add a default text in the text box to make it more attractive to the visitors.
Just remove the code below
<p>Enter your email address:</p><p><input type="text" style="width:140px" name="email"/></p>

and replace with
<p><input type="text" style="width:140px" name="email" onblur="if (this.value == '') {this.value = 'Enter your email address';}" onfocus="if (this.value == 'Enter your email address') {this.value = '';}" value="Enter your email address"/></p>
You can change with your desire default text.

How to Change Font Size and Font Colour of the Text
Add font-size:20px;color:#00CCFF right after width:140px
So the code would be:-
<input type="text" style="width:140px;font-size:20px;color:#00CCFF;" name="email"/>
You can change with your desire font size and font colour.

How to Remove “Delivered by Feedburner” Link
Just remove the following part from your code:
<p>Delivered by <a href="http://feedburner.google.com" target="_blank">FeedBurner</a></p>

That’s all. If you face any problem in Customize Feedburner Email Subscription Form. Feel free to contact me through  your valuable comments!

Pure CSS3 Multi Level Drop Down Menu For Blogger V1

I recently posted Add Smooth Multi Level Drop-Down Menu In Blogger. But this is simple, smooth not just a perfect good looking Stylish Pure CSS3 Multi Level Drop Down Menu. Now I comes with Stylish Pure CSS3 Multi Level Drop Down Menu For Blogger. This menu is purely designed with CSS3 and No Images, No javascript is included in it. It is compatible for almost all browsers like Mozilla Firefox and Google Chrome etc but the rounded corners and shadow will not be rendered properly. This menu is provided by webDesignerWall. I have made installation method very easy you just need to copy and paste the code to where you want Multi Level Drop Down Menu to appear.

Pure CSS3 Multi Level Drop Down Menu Preview

stylish drop down menu v1

Live Demo

Add Multi Level Drop Down Menu To Blogger

  1. Go To Blogger > Design
  2. Click on “Add a Gadget”
  3. Choose HTML/Javascript widget
  4. Paste the following code inside it
<style>
#ABT-Container  {
    font: normal .8em/1.5em Arial, Helvetica, sans-serif;
    background: #ebebeb;
     width:100%; float:left;    
}

a {
    color: #333;
}
#nav {
    margin: 0;
    padding: 7px 6px 0;
    line-height: 100%;
    border-radius: 2em;

    -webkit-border-radius: 2em;
    -moz-border-radius: 2em;
    
    -webkit-box-shadow: 0 1px 3px rgba(0, 0, 0, .4);
    -moz-box-shadow: 0 1px 3px rgba(0, 0, 0, .4);

    background: #8b8b8b; /* for non-css3 browsers */
    filter:  progid:DXImageTransform.Microsoft.gradient(startColorstr='#a9a9a9', endColorstr='#7a7a7a'); /* for IE */
    background: -webkit-gradient(linear, left top, left bottom, from(#a9a9a9), to(#7a7a7a)); /* for webkit browsers */
    background: -moz-linear-gradient(top,  #a9a9a9,  #7a7a7a); /* for firefox 3.6+ */

    border: solid 1px #6d6d6d;
}
#nav li {
    margin: 0 5px;
    padding: 0 0 8px;
    float: left;
    position: relative;
    list-style: none;
}
/* main level link */
#nav a {
    font-weight: bold;
    color: #e7e5e5;
    text-decoration: none;
    display: block;
    padding:  8px 20px;
    margin: 0;
    -webkit-border-radius: 1.6em;
    -moz-border-radius: 1.6em;
    text-shadow: 0 1px 1px rgba(0, 0, 0, .3);
}
/* main level link hover */
#nav .current a, #nav li:hover > a {
    background: #d1d1d1; /* for non-css3 browsers */
    filter:  progid:DXImageTransform.Microsoft.gradient(startColorstr='#ebebeb', endColorstr='#a1a1a1'); /* for IE */
    background: -webkit-gradient(linear, left top, left bottom, from(#ebebeb), to(#a1a1a1)); /* for webkit browsers */
    background: -moz-linear-gradient(top,  #ebebeb,  #a1a1a1); /* for firefox 3.6+ */

    color: #444;
    border-top: solid 1px #f8f8f8;
    -webkit-box-shadow: 0 1px 1px rgba(0, 0, 0, .2);
    -moz-box-shadow: 0 1px 1px rgba(0, 0, 0, .2);
    box-shadow: 0 1px 1px rgba(0, 0, 0, .2);
    text-shadow: 0 1px 0 rgba(255, 255, 255, .8);
}
/* sub levels link hover */
#nav ul li:hover a, #nav li:hover li a {
    background: none;
    border: none;
    color: #666;
    -webkit-box-shadow: none;
    -moz-box-shadow: none;
}
#nav ul a:hover {
    background: #0399d4 !important; /* for non-css3 browsers */
    filter:  progid:DXImageTransform.Microsoft.gradient(startColorstr='#04acec', endColorstr='#0186ba'); /* for IE */
    background: -webkit-gradient(linear, left top, left bottom, from(#04acec), to(#0186ba)) !important; /* for webkit browsers */
    background: -moz-linear-gradient(top,  #04acec,  #0186ba) !important; /* for firefox 3.6+ */

    color: #fff !important;
    -webkit-border-radius: 0;
    -moz-border-radius: 0;
    text-shadow: 0 1px 1px rgba(0, 0, 0, .1);
}
/* level 2 list */
#nav ul {
    background: #ddd; /* for non-css3 browsers */
    filter:  progid:DXImageTransform.Microsoft.gradient(startColorstr='#ffffff', endColorstr='#cfcfcf'); /* for IE */
    background: -webkit-gradient(linear, left top, left bottom, from(#fff), to(#cfcfcf)); /* for webkit browsers */
    background: -moz-linear-gradient(top,  #fff,  #cfcfcf); /* for firefox 3.6+ */

    display: none;
    margin: 0;
    padding: 0;
    width: 185px;
    position: absolute;
    top: 35px;
    left: 0;
    border: solid 1px #b4b4b4;
    -webkit-border-radius: 10px;
    -moz-border-radius: 10px;
    border-radius: 10px;
    -webkit-box-shadow: 0 1px 3px rgba(0, 0, 0, .3);
    -moz-box-shadow: 0 1px 3px rgba(0, 0, 0, .3);
    box-shadow: 0 1px 3px rgba(0, 0, 0, .3);
}
/* dropdown */
#nav li:hover > ul {
    display: block;
}
#nav ul li {
    float: none;
    margin: 0;
    padding: 0;
}
#nav ul a {
    font-weight: normal;
    text-shadow: 0 1px 1px rgba(255, 255, 255, .9);
}
/* level 3+ list */
#nav ul ul {
    left: 181px;
    top: -3px;
}
/* rounded corners for first and last child */
#nav ul li:first-child > a {
    -webkit-border-top-left-radius: 9px;
    -moz-border-radius-topleft: 9px;
    -webkit-border-top-right-radius: 9px;
    -moz-border-radius-topright: 9px;
}
#nav ul li:last-child > a {
    -webkit-border-bottom-left-radius: 9px;
    -moz-border-radius-bottomleft: 9px;
    -webkit-border-bottom-right-radius: 9px;
    -moz-border-radius-bottomright: 9px;
}
/* clearfix */
#nav:after {
    content: ".";
    display: block;
    clear: both;
    visibility: hidden;
    line-height: 0;
    height: 0;
}
#nav {
    display: inline-block;
}
html[xmlns] #nav {
    display: block;
}
* html #nav {
    height: 1%;
}
</style>

<div id="ABT-Container">
<ul id="nav"><li><a href="#">Home</a></li>
<li><a href="#">Technology Tricks</a>
<ul>
<li><a href="#">Sub-Row</a>
<ul>
<li><a href="#">Sub Sub-Row 1</a></li>
</a></li></ul>
</li>
<li><a href="#">Sub-Row</a>
<ul>
               
<li><a href="#">Sub Sub-Row 2</a></li>
</ul>
</li>
<li><a href="#">Sub-Row</a></li>
</ul>
</li>

<li><a href="#">Multi-Levels</a>
<ul>
<li><a href="#">Team</a>
<ul>
<li><a href="#">Sub-Level Item 1</a></li>
<li><a href="#">Sub-Level Item 1</a>
<ul>
<li><a href="#">Sub-Level Item 11</a></li>
<li><a href="#">Sub-Level Item 22</a></li>
<li><a href="#">Sub-Level Item 33</a></li>
</ul>
</li>
                   
<li><a href="#">Sub-Level Item 1</a></li>
</ul>
</li>
<li><a href="#">Sales</a></li>
<li><a href="#">Another Link</a></li>
<li><a href="#">Department</a>
<ul>
<li><a href="#">Sub-Level Item 2</a></li>
</ul>
</li>
</ul>
</li><li><a href="#">Home</a></li>   
<li><a href="#">About Me</a></li>
<li><a href="#">Contact Me</a></li>
<li><a href="#">Blogger Tutorials</a></li>


</ul>
</div>

The best part about this Multi Level Drop Down Menu is that you can give it any colour you want because here we are using a transparent gradient image which can take any colour you want. Like:

Transperent ExapmleNow kindly make these customization changes to add your own links to menu:

  • Each TAB can be edited by directly understanding the following  HTML code,

<li><a href=”#“>TAB TEXT</a></li>

In each case replace the hash sign (#) with your page URL or link and replace the text with your page title. I have kept the page titles unchanged in the code above so that you could easily edit them by seeing the demo.

This is V1 of Multi Level Drop Down Menu. I will soon publish another article on this cool Multi Level Drop Down Menu. Till than stay tune!

Confused or Need Help?

If you need some extra help in removing rows or columns then please feel free to post your questions. You can discus it as much with me as possible. This will help others to better understand on how to make further changes. :D

Add Smooth Multi Level Drop-Down Menu In Blogger

Now you can easily Add Navigation Menu in Blogger with ease. Smooth Navigation Menu is a multi level, CSS list based menu powered using jQuery that makes website navigation a smooth and that’s a good thing given the important role of this element in any site.Smooth-Navigational-Menu-in-Blogger

Steps to Add Smooth Multi Level Drop-Down Menu In Blogger

Note: Before making any changes to your template, take a full backup of your blogger template.

#Step 1. Log in to your Blogger Dashboard and Navigate to Design > Edit HTML.

Design Edit HTML

#Step 2. Find this code:</head> and replace it wit this code:

<link href=’https://sites.google.com/site/addinblogger/how-to-add-in-blogger/ddsmoothmenu.css’ rel=’stylesheet’ type=’text/css’/>
<link href=’https://sites.google.com/site/addinblogger/how-to-add-in-blogger/ddsmoothmenu-v.css’ rel=’stylesheet’ type=’text/css’/>
<script src=’http://ajax.googleapis.com/ajax/libs/jquery/1.2.6/jquery.min.js’ type=’text/javascript’/>
<script src=’https://sites.google.com/site/addinblogger/how-to-add-in-blogger/ddsmoothmenu.js’ type=’text/javascript’>
/***********************************************
* Smooth Navigational Menu- (c) Dynamic Drive DHTML code library (www.dynamicdrive.com)
* This notice MUST stay intact for legal use
* Visit Dynamic Drive at http://www.dynamicdrive.com/ for full source code
***********************************************/
</script>
<script type=’text/javascript’>
ddsmoothmenu.init({
mainmenuid: “smoothmenu1”, //menu DIV id
orientation: ‘h’, //Horizontal or vertical menu: Set to “h” or “v”
classname: ‘ddsmoothmenu’, //class added to menu’s outer DIV
//customtheme: [“#1c5a80”, “#18374a”],
contentsource: “markup” //”markup” or [“container_id”, “path_to_menu_file”]
})
ddsmoothmenu.init({
mainmenuid: “smoothmenu2”, //Menu DIV id
orientation: ‘v’, //Horizontal or vertical menu: Set to “h” or “v”
classname: ‘ddsmoothmenu-v’, //class added to menu’s outer DIV
//customtheme: [“#804000”, “#482400”],
contentsource: “markup” //”markup” or [“container_id”, “path_to_menu_file”]
})
</script>
</head>

#Step 3. Now navigate to Design > Page Element and click on Add a Gadget > HTML/Javascript and insert the following code and click Save button.

Design-Page Element
<h2>Example 1</h2>
<div id=”smoothmenu1″>
<ul>
<li><a href=”http://bloggerhowtotips.blogspot.com/”>Blogger How To Tips</a></li>
<li><a href=”#”>Folder 0</a>
<ul>
<li><a href=”#”>Sub Item 1.1</a></li>
<li><a href=”#”>Sub Item 1.2</a></li>
<li><a href=”#”>Sub Item 1.3</a></li>
<li><a href=”#”>Sub Item 1.4</a></li>
<li><a href=”#”>Sub Item 1.2</a></li>
<li><a href=”#”>Sub Item 1.3</a></li>
<li><a href=”#”>Sub Item 1.4</a></li>
</ul>
</li>
<li><a href=”#”>Folder 1</a>
<ul>
<li><a href=”#”>Sub Item 1.1</a></li>
<li><a href=”#”>Sub Item 1.2</a></li>
<li><a href=”#”>Sub Item 1.3</a></li>
<li><a href=”#”>Sub Item 1.4</a></li>
<li><a href=”#”>Sub Item 1.2</a></li>
<li><a href=”#”>Sub Item 1.3</a></li>
<li><a href=”#”>Sub Item 1.4</a></li>
</ul>
</li>
<li><a href=”#”>Item 3</a></li>
<li><a href=”#”>Folder 2</a>
<ul>
<li><a href=”#”>Sub Item 2.1</a></li>
<li><a href=”#”>Folder 2.1</a>
<ul>
<li><a href=”#”>Sub Item 2.1.1</a></li>
<li><a href=”#”>Sub Item 2.1.2</a></li>
<li><a href=”#”>Folder 3.1.1</a>
<ul>
<li><a href=”#”>Sub Item 3.1.1.1</a></li>
<li><a href=”#”>Sub Item 3.1.1.2</a></li>
<li><a href=”#”>Sub Item 3.1.1.3</a></li>
<li><a href=”#”>Sub Item 3.1.1.4</a></li>
<li><a href=”#”>Sub Item 3.1.1.5</a></li>
</ul>
</li>
<li><a href=”#”>Sub Item 2.1.4</a></li>
</ul>
</li>
</ul>
</li>
<li><a href=”https://allbloggingtips.com/”>All Blogging Tips</a></li>
</ul>
<br style=”clear: left” />
</div>
<h2 style=”margin-top:200px”>Example 2</h2>
<div id=”smoothmenu2″>
<ul>
<li><a href=”https://allbloggingtips.com/”>Blogger Tips and Tricks</a></li>
<li><a href=”#”>Folder 0</a>
<ul>
<li><a href=”#”>Sub Item 1.1</a></li>
<li><a href=”#”>Sub Item 1.2</a></li>
<li><a href=”#”>Sub Item 1.3</a></li>
<li><a href=”#”>Sub Item 1.4</a></li>
<li><a href=”#”>Sub Item 1.2</a></li>
<li><a href=”#”>Sub Item 1.3</a></li>
<li><a href=”#”>Sub Item 1.4</a></li>
</ul>
</li>
<li><a href=”#”>Folder 1</a>
<ul>
<li><a href=”#”>Sub Item 1.1</a></li>
<li><a href=”#”>Sub Item 1.2</a></li>
<li><a href=”#”>Sub Item 1.3</a></li>
<li><a href=”#”>Sub Item 1.4</a></li>
<li><a href=”#”>Sub Item 1.2</a></li>
<li><a href=”#”>Sub Item 1.3</a></li>
<li><a href=”#”>Sub Item 1.4</a></li>
</ul>
</li>
<li><a href=”#”>Item 3</a></li>
<li><a href=”#”>Folder 2</a>
<ul>
<li><a href=”#”>Sub Item 2.1</a></li>
<li><a href=”#”>Folder 2.1</a>
<ul>
<li><a href=”#”>Sub Item 2.1.1</a></li>
<li><a href=”#”>Sub Item 2.1.2</a></li>
<li><a href=”#”>Folder 3.1.1</a>
<ul>
<li><a href=”#”>Sub Item 3.1.1.1</a></li>
<li><a href=”#”>Sub Item 3.1.1.2</a></li>
<li><a href=”#”>Sub Item 3.1.1.3</a></li>
<li><a href=”#”>Sub Item 3.1.1.4</a></li>
<li><a href=”#”>Sub Item 3.1.1.5</a></li>
</ul>
</li>
<li><a href=”#”>Sub Item 2.1.4</a></li>
</ul>
</li>
</ul>
</li>
<li><a href=”https://allbloggingtips.com/”>All Blogspot Tips</a></li>
</ul>
<br style=”clear: left” />
</div>

#Step 4. Save template and done!.

add menu in blogger

After adding the menu your blog layout will be look like in image above, as usual if you have any doubt please comment.

Credits

Above smooth multi level drop-down menu is powered by DynamicDrive. See this link for more customization: http://www.dynamicdrive.com/dynamicindex1/ddsmoothmenu.htm

10 Most Popular and Best Statistics Plugin For WordPress

Running a WordPress blog, it’s far enough to have a good hosting, beautiful theme and content. It’s also important to analyze your website.

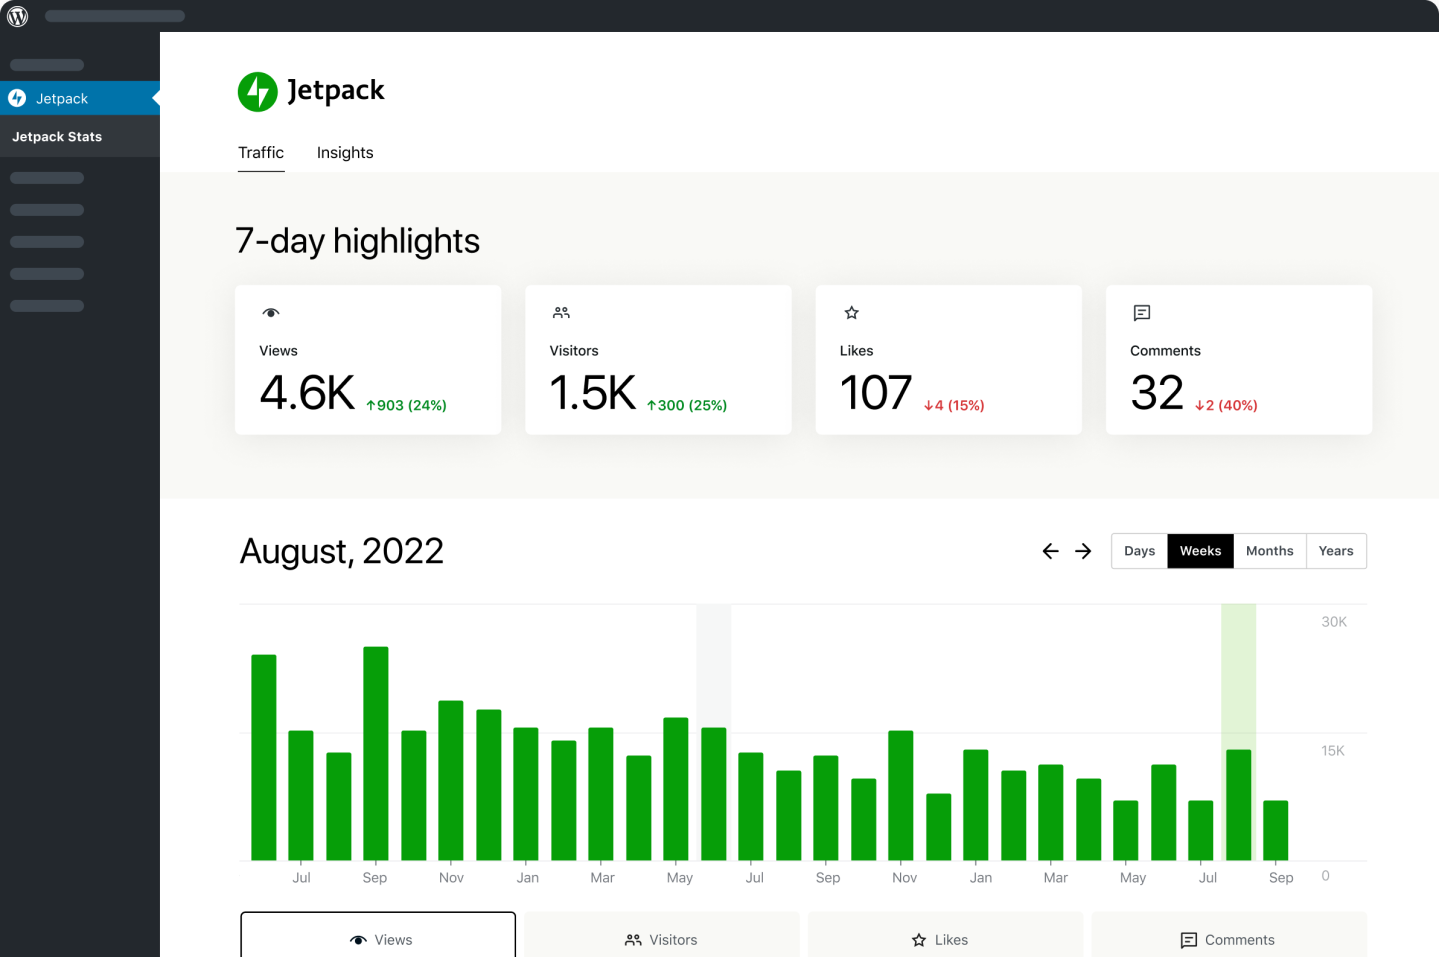
You need to find out who your audience it, who are visiting your site, where they are coming for, what they are reading. Unfortunately, WordPress doesn’t come with built-in stats feature to monitor traffic and visitors, but there are certainly a few plugins you can use to keep the record of your data amount, tracking of the users and visitors, tracks the offline activity, etc. A WordPress statistics plugin is a necessary thing for your website..

It’s extremely difficult to find the best WordPress plugins as there are over 29,000 plugins available in the WordPress plugins directory.

I’m going to feature over 10 plugins. I’m not using all of them, I try to use as minimum plugins as I can. Why? Because using too many plugins affects the performance of your blog. So install plugin that you really need.

1- JetPack by WordPress.com

jetpack stats plugin for wordpress-compressed
This is the best stat plugin for WordPress and, is exclusively for the users of WordPress, which let them know about the daily users, visitors, customization, mobile visitors, tools, traffic, etc.

I’m using Jetpack from the day I started this plugin. It comes with over 25 modules to manage almost everything on your blog. I definitely recommend it.

It has additional features like:

  • Augments your visitors, gets you spam free comments, gets you notification, likes, social sharing, other tools and enhanced distribution.
  • This plugin has themes available for the table and mobile users and they can be customized easily as well.
  • It supplies the complete security to your WordPres website and has the anti-virus sites like Akismet, Single Sign On, and JetPack Monitor.
  • You can easily customize the whole website as per your own taste. There are options like Infinite Scroll, Sidebar Widgets, Custom CSS, Tiled Galleries and much more.

Download Now

2- Google Analyticator:

Google analyticar stats plugin for wordpress
With this plugin, you can put in JavaScript code to allow the Google Analytics log in your website. There are different widgets available in this plugin which makes the data appear easily on your admin page and in the blog. The additional features are:

  • Carry the download link trail.
  • Speed tracking of site.
  • Displays you the visitor’s statistic information in a widget.
  • Any code provided by the Google can be tracked.
  • Provides the translations into local languages.
  • It is easy to install.
  • It has this feature of concealing the Google UID descends.

Download Now

3- kStats Reloaded:

kstats reloaded
Coming from the old, but very useful site StatPress, the kStat Reloaded is much prompt and advance WordPress statistic plugin. This plugin has some amazing features for the WordPress blogs. It lets you inform about the number of visitors, the timing of their visit, and the place of their visit, the page visits you get and what is the indexing of your WordPress blog right now.

This advanced plugin kStat has the revised features of storing and keeping the information about the visitors and users. This plugin has bit difficult database schemes.

Download Now

4- Blog Stats by W3Counter

w3counter stat plugin for WordPress

This one of free statistics plugin for WordPress plugin has the widget which it inserts to your sidebar automatically with the tracking  code. This plugin is very much in use by the webmasters. It is simple to use and can be run by any user even if they do not know much about dealing with these plugins. The plugin is so much popular that it gets more than 30 downloads per day. It tells you all about the number of daily visitors, top posts, searches and traffic coming your way with the exact numbers.

Download Now

5- WassUp Real Time Analytics

wassup statistic plugin for WordPress
This is very useful site for those who want to keep an eye on the visiting and the activity of the visitors. The WassUp has an in detail console, which shows you that what are your visitors doing on the website.

You get to see an individual act rather than the gathered data of the visitors. You will get to see that what keyword, time period, type of visitors, etc.

This WordPress stat plugin also shows you that which visitor is online and what are they up to from which location. There are two spams detected functions are present in this plugin.

Download Now

6- Analytics 360

stat plugin for wordpress
It gathers the Google Analytics and MailChimp’s Analytics360 plugin data into one dashboard. You can check that which users are adding into your mailing list and what is the status of current address and the new addresses. With the tab of campaign traffic, you can individually assess that how much traffic is coming towards your website with the single email campaign.

This stats plugin for WordPress will help you in finding out that that is the new visitors coming to your website through which reference or if they are visiting directly. Along with these main services, there are so many other services by the Analytics 360 plugin as well.

Download Now

7- WP-Stats-Dashboard

wp stats dasboard
WP-Stats Dashboard is one of best wordpress stats plugin. This multipurpose plugin helps you in getting the stats about your social engagement, ranking in the Alexa, blog traffic and much more. The additional features are like:

  • Translate your page for the external users.
  • Chase the social metrics of 50+.
  • Finds the profile.
  • Number of stats dashboard widgets.
  • Provides you the sidebar widgets such as: every day graphs, social metrics, top authors, etc.

Download Now

8- StatPress Reloaded

k stats reloaded

This WP stat plugin has the brilliant offers for the WordPress blogs. You can check out the keyword search, browsers, visitors, OS information without any issue.

You can easily get the information about your blog once you install it on your WordPress blog. It can tell you the stats by showing it on the sidebar. With the limited space; the plugin removes the older documentation. There are several language options as well.

Download Now

9- Advanced Blog Metrics

best stat plugin wordpress
Progress your blog’s performance by adding this plugin to your WordPress blog. It has the features like:

  • Tells you the right time to post your release.
  • How many comments you received in a day.
  • Tells you the highest number authors who made the comments.
  • What is the time when your post is getting the most number of comments?

Download Now

10- WP Statistics

wp stat plugin
This plugin has its own way of collecting, generating, informing you about the blog statistics. It gets to know you about the:

  • Pages which are getting the highest number of visitors.
  • Repost of statics through email.
  • Who is visiting your website right now?
  • How many people are online on the website right now?
  • Updates to the GeoIP database.

Download Now

My Suggestions

All above best WordPress stats plugin are the best to use for your WordPress site. Though, it is alright when you install only one plug-in as the entire above mentioned plug-in have the best features.

When it comes to choosing from the above given best WordPress stat plugin, then Jetpack seems like the most appropriate one for the WordPress statistic plugin. I recommend Jetpack because it comes with lots of built in features like social sharing, custom css, shorten link, socialize, mobile theme and so on.

How do you track stats on your blog? What’s your favorite stats plugin for WordPress?

7 Killer SEO Steps to Optimize Your Website in SERP

SEOSEO optimize your blog or make it appear on top Search Engine Results to enhance the traffic on your site. Basically, the thing matters here, is to figure out the keywords on which you want the visitors to reach your site through Search Engine Results Page (SERP). If you are new to blogging and SEO in particular, you should be aware of some basic SEO tips to improve your site’s ranking in the SERPs.

7 Killer SEO Steps to Optimize Your Website in SERP


1. Keywords in Title Tag

Title Tag is one of the most significant elements to position your webpage higher in your chosen keyword. This tag gets visible in the clickable link on the SERPs. It’s better to start your title with a long-tail keyword having less competition. Try to use your Keyword within the range of 65 characters, as search engine don’t consider anything after 65 character limit. Don’t repeat your Keyword in your title; otherwise your site could be penalized.

2. Use Keywords in Header Tags

Header tags are one of the most imperative On-page search engine optimization factors. Use the similar keywords in all heading tags. This way, you can easily bring focus of the page on a sole keyword while getting superiority in the Search Engines. You should better utilize your main keyword in first heading tag while trying to keep the Keyword at first.

3. Use Keywords in Image Alt tag

Images can express many words but SE Spiders don’t translate images, they only read the alt tag to understand the image with textual description. Therefore, it is vital to provide a significant description of an image with using keywords. It will optimize the images used in your content and rank them higher in image searches.

4. The Power of Internal Linking

One significant factor of SEO that is often ignored is Internal Linking. The better approach is to reactivate and revitalize the old posts in archive, as compared to link them in your fresh posts. Don’t miscalculate the authority of internal linking in the distribution of page rank.

5. Links from Directories

Planting in directories, such as Yahoo, DMOZ and other article and content listings can be quite helpful to achieve positive ranking overall. Some people believe that it’s not possible to list your content on DMOZ, especially if you don’t have much credible data, but if you could, it may bring you positive results.

6. Use Meta Description

Though Google is now giving less importance to meta-tags, there are two meta-tags that still matter in SEO, But, Meta description Tag still has importance from a human and search engine perspective. Description meta-tag is what you use to illustrate your website. In fact, this description is what the visitors see when your site appears on the search results.

7. Use Keywords Meta Tag

Fill your Keyword tags with relevant keywords while avoiding replicas and Keyword stuffing. The Keywords you mention in the keyword tag should be relevant to the context of your page. Keywords used in meta-keywords-tag must somehow appear somewhere within the body of text. Otherwise, your webpage can be penalized for irrelevant content.

About The Author
This is guest post by Sarah Smith who is a professional Guest blogger. Writing for MacKeeper-useful software that will help you with Mac fix and Mac scan.