Congratulations on taking the first step to start your own blog which is ACTION.
I’ll walk you through 5 easy steps to start your own self-hosted WordPress blog in few minutes. This is an easy to follow step by step guide for you to have your own blog where you can post whatever you want.
Let’s jump in!
Step 1: Decide your domain name
The first step to starting your blog is to decide your domain name. Domain name is basically the address of your blog which people will use to visit it and similarly, web hosting is a house where your blog will be store.
Brainstorm few ideas that comes in your mind. Here are quick tips for choosing a domain name.
- Choose short and unique domain name.
- Make it easy to remember and say
- Avoid using hyphens (-) or numbers in your domain as far as possible.
- Make domain easily to remember. It’ll make blog better. This is also useful for branding your blog.
Make a list of at least 3-5 domains that you like and choose the best one. If you’re confused simply ask your friends and family for the best one and then go for it.
Step 2: Signup for Hosting
The next step is to signup for hosting for your blog.
I recommend Bluehost to host your blog because of following reasons:
- When you signup for the first time you’ll get free domain name for the first year!
- Bluehost provides affordable hosting and you can start your blog for just $3.49/month only
- They have great customer support – they’re ready to help you fix any issue with your blog in few minutes through live support, email or phone.
Signup for Bluehost and get free domain
Now to get your blog up and running quickly. Go to Bluehost and click “get started”
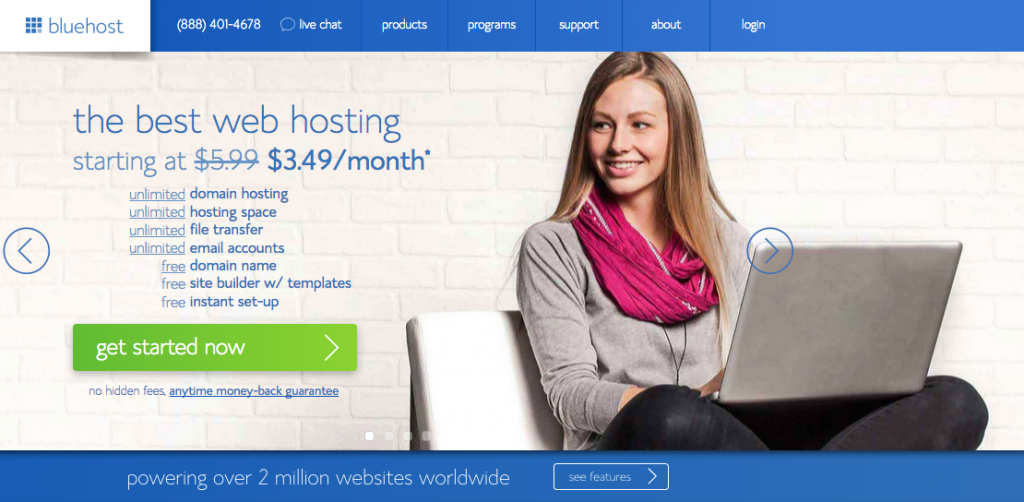
Select your hosting plan. I recommend Basic if you’re just starting out. You can always upgrade later if your needs change.
Enter the domain name you want to register
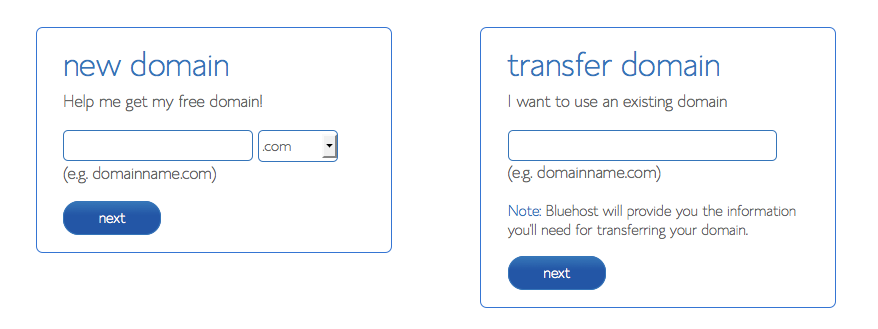
Fill out your information
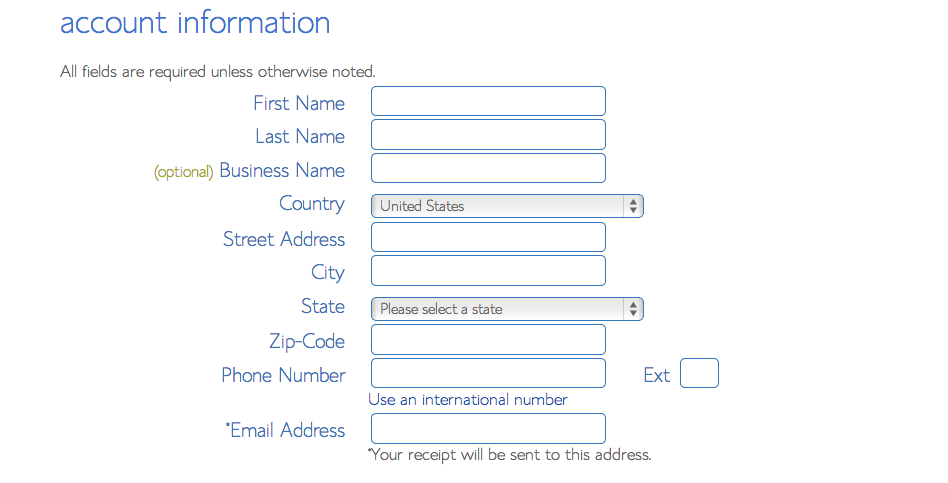
Once you’ve finished, scroll down to this part:
You don’t have to select every option available there. So, remove all the checkmarks. You don’t really need any of them.
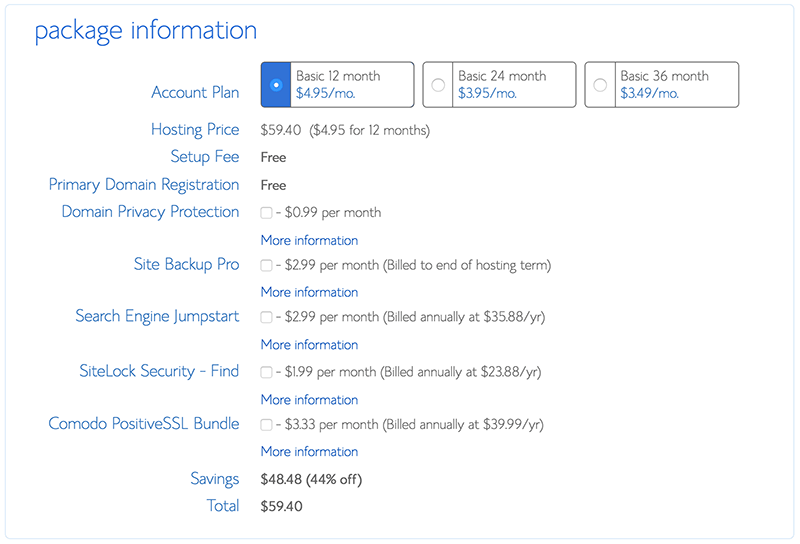
You may want to consider checklist the Domain Privacy Protection option if you’ve more money. It’ll hide your personal information.
And..the last step is to enter your credit card information to pay.
Step 3: Installing WordPress
Under “Website Builders”, click “Install WordPress”.
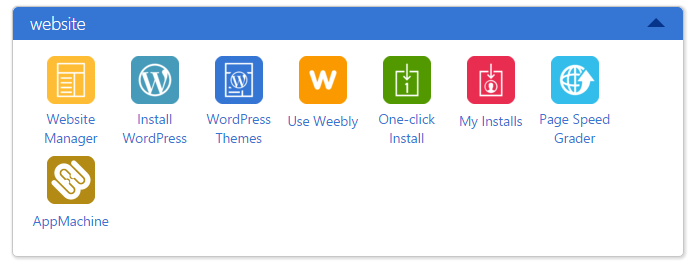
Select “Do It Yourself (FREE)” portion.
This will open a new tab or window, where you will press “install” button.

Select your domain with the dropdown list. After bluehost check the domain, it will ask you to check off the terms and conditions box.
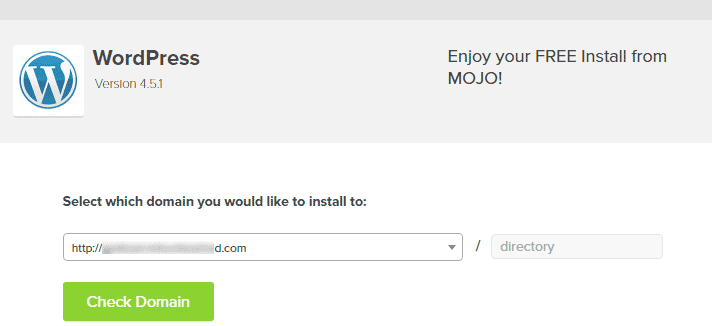
Now enter your blog title, username and password that will be used to login to your new WordPress blog.
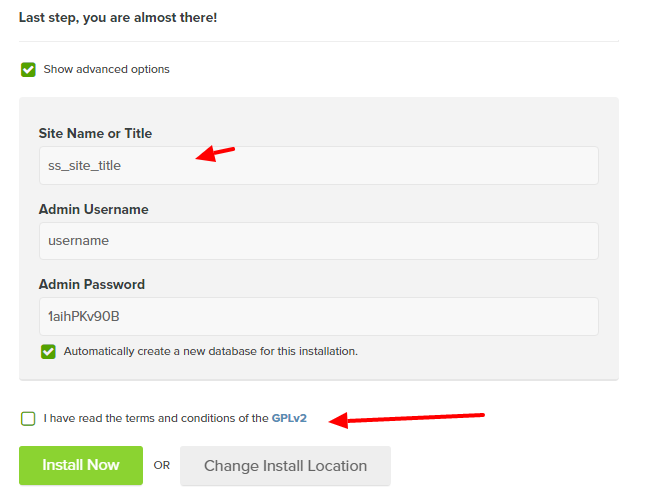
Do that, and press: Install Now.
You may be directed to a themes page. Don’t buy any of them yet. You can easily find many great themes for free.
When the install is complete, press the “View Credentials” button.
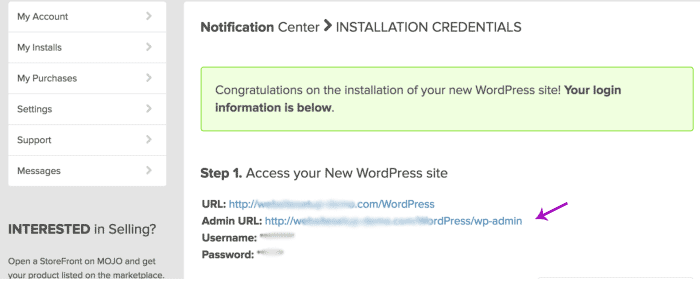
Press “view” button, and click on the “Admin URL”.
Step 4: Install WordPress Theme
Next thing you need to do is to install a good looking WordPress theme.
There are many free themes available for your WordPress blog and you can choose them if you are not ready to spend money on getting a premium theme and features.
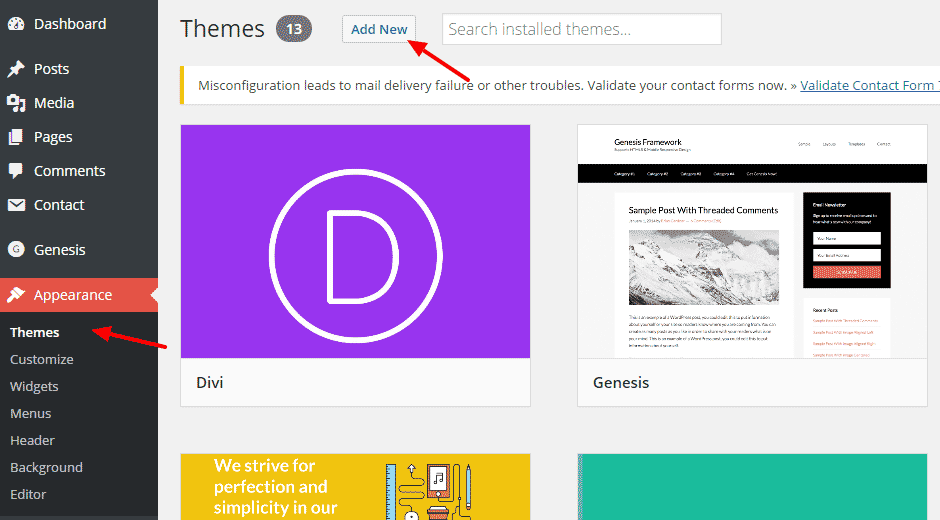
Here’s how to find a free theme. Log into your WordPress dashboard and go to Appearance > Themes and now select Add New Theme option
Click Popular button as shown below. There you’ll find many great themes simply click on anyone you like and install it.
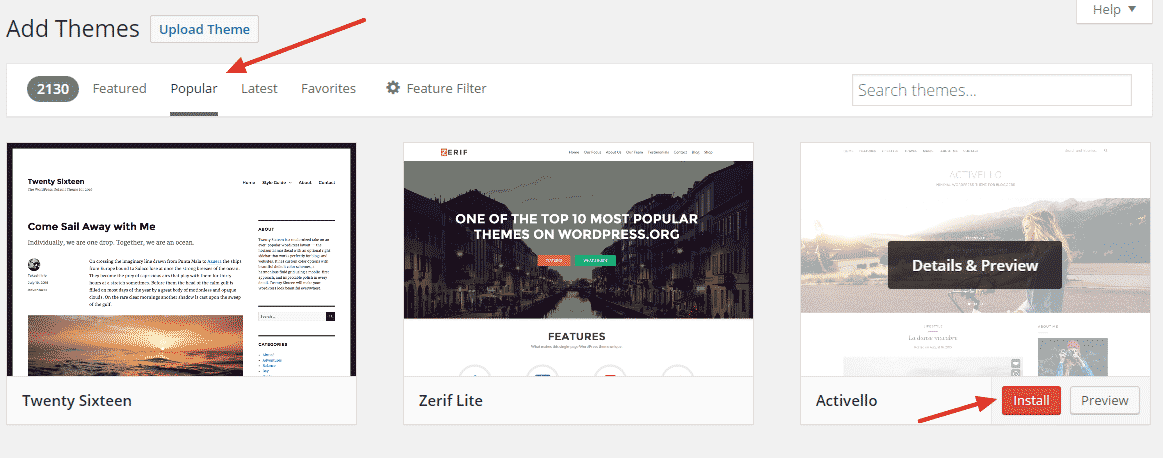
You’re done!
Step 5: Publish your first blog post
Let’s publish your first post ever so you can tell your friends and family that you’ve a blog.
WordPress makes publishing a new blog post quite easy. Here’s a visual guide to publish your post.
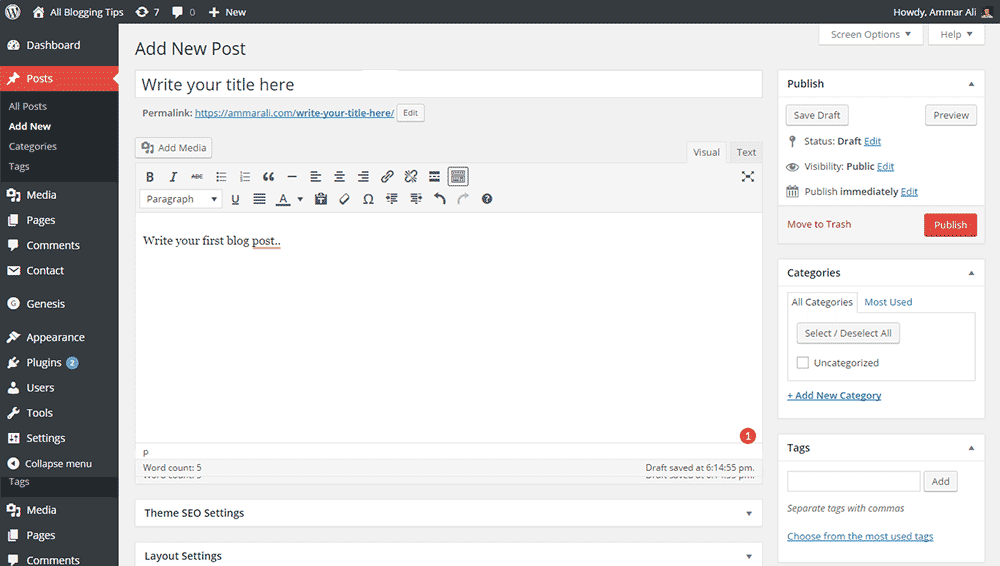
Click on Add New under Posts > Write your title > Write your post content > Add the tags > Choose category > Hit the publish button.
You’re done!
Congratulations on publishing your first blog post. Don’t forget to tell your friends and family about it. ;-)
Next: Grow your blog
 You’re reading this chances are you have made the decision to delete your blogger blog or account.
