• Skip to primary navigation
  • Skip to main content
  • Skip to primary sidebar
  • Skip to footer
logo

All Blogging Tips

Everything About Blogging

  • Home
  • Start a Blog
  • Grow Your Blog
  • About
  • Contact
  • Privacy Policy
  • Tools I Use

3 Ways To Add Floating Go To Top Button In WordPress Blogs

By Ammar Ali 10 Comments

We all don’t want to lose visitors. When after scrolling long deep pages, if a readers has to go back to top of page, he/she has to do this by pressing the up button located on the right side of our browser, which is very annoying.

Isn’t it?

Goto TOp

But don’t worry you can now make  your visitors stay on your blog by using our tutorial How To Add Floating Go To Top Button In WordPress Blogs.

This will Add Floating Go To Top Button In WordPress Blogs which will help you go back to top of page with just one click, no matter what is the position of the page, even if you are half way down the post, you can click this button to go back to top.

3 Ways To Add Floating Go To Top Button In WordPress Blogs

1. Add Simple Code To Your Blog (Best Way)
2. Use Scroll To Top WordPress Plugin
3. Use Go To Top WordPress Plugin

1. Add Simple Code To Your Blog.

This is simple way to add go to top button, best way to add code to your blog. This will also add a cool image but you can change it to your own image.
Goto top code demp

  • Goto WordPress Dashboard > Appearance >Widget
  • Drop a Text Widget to your sidebar.
  • Now Paste below code in Text Widget

 <a style="display:scroll;position:fixed;bottom:5px;right:5px;" href="#"><img src="http://lh6.ggpht.com/_7wsQzULWIwo/SgXYIY37QsI/AAAAAAAABDY/IyDZK-CJzdA/Up1Blue%5B4%5D.png"/></a>

  • Click on Save Button and See the magic!

Note: You can also add image you want to do so just replace http://lh6.ggpht.com/_7wsQzULWIwo/SgXYIY37QsI/AAAAAAAABDY/IyDZK-CJzdA/Up1Blue%5B4%5D.png with your image url.

2. Use Scroll To Top WordPress Plugin.

Fully written in jQuery, the plugin adds a floating box centered in the footer of your site that only appears when you scroll the page down, and when clicked gently roll the site to the top. All this without any modification to your template.

How To use it?
Scroll To Top

  • Download Plugin Here
  • You can either use the automatic plugin installer or your FTP program to upload it to your wp-content/plugins directory the top-level folder. Don’t just upload all the php files and put them in /wp-content/plugins/.
  • Activate the plugin through the ‘Plugins’ menu in WordPress
  • Visit your Scroll to Top Options (Options – Scroll to Top)
  • Configure any options as desired, and then enable the plugin
  • That’s it!

3. Use Go To Top WordPress Plugin.

This plugin will Add a “Go to top” link to your posts. This is a wordpress plugin which based on jQuery, jQuery Easing and Scroll to Top v3

How To use it?Goto Top WP plugin

  1. Download Plugin Here
  2. Upload the plugin folder to the /wp-content/plugins/ directory or use Dashboard Method
  3. Activate the plugin through the ‘Plugins’ menu in WordPress

That’s All. Hope you will like this post. If you face any problem just comment below, I’d be glad to help you out.

How To Remove Thesis Footer Text And WordPress Admin Link

By Ammar Ali 2 Comments

In this post I am going to show you How To Remove Thesis Footer Text And WordPress Admin Link. Everyone wants to remove default Thesis Footer Text and WordPress Admin Link to add their own copyrights, Or as they want.Here I am going to show two process in above heading, first one is how to remove footer thesis theme link, and second one is how to remove WordPress Admin Link.

Remember, you should have thesis developer edition to remove the attribute in footer. In personal edition, you should not remove it.

See Also:  How To Add Logo To WordPress Login Screen

How To Remove Thesis Footer Text or Attribution?

  1. First you have to go your wordpress admin.
  2. In wordpress admin, go to thesis option.
  3. In thesis option, go to custom file editor, click Custom_funtion.php and paste below code or use FTP and put below code in launch.php. (Why I prefer FTP. At the time of accessing Custom_funtion.php via your wordpress admin, it is showing some warning message. That’s why I prefer FTP)
/* Remove footer link or Attribution*/remove_action('thesis_hook_footer', 'thesis_attribution');

How To Remove WordPress Admin Link From Footer?

  1. The Thesis theme gives you an option to remove the admin link from the footer in the Thesis “Site Options” panel.
  2. First, go to Thesis “Site Options” panel, and in the “Display Options” under “Administration” un-check the box that says ” Show admin link in footer”. It’s that easy!

how-admin-link-in-footer

3.  Don’t forget, “The Big Save Button”!

If you got any problem in above process ( remove thesis footer text ), write in comment box. I will help you. If it is useful for you, share your experience in comment box.

Happy New Year 2012 Balloons Widget

By Ammar Ali 3 Comments

Happy New Year 2012 Ballons WidgetThe year of 2011 will be over soon, and We countdown to welcome the year of 2012, to say a Happy New Year 2012 with a new spirit, the new breakthrough for everything to be better, yes we hope so. I now comes with Happy New Year 2012 Balloons Widget. It is just like we have posted for Christmas Snow Falling Effect in earlier post.

Live Demo

See Previous Widget:-New Year Countdown Widget For Blogger
See Also: Snow Falling Effect Widget For WordPress and Blogger Blogs

How To Add Happy New Year 2012 Balloons Widget To Blogger

1. Login to Blogger
2. Dashboard > Design > Page Elements. Then you click “Add A Gadget”
3. Now you choose “HTML/Java Script”
4. Now copy and paste the code below to widget box

<img src="https://allbloggingtips.com/wp-content/uploads/2011/12/Widget2-Happy-New-year-20121.png" style="position:fixed; top: 0px;left:0px;border:none;z-index:5;"/><img src="https://allbloggingtips.com/wp-content/uploads/2011/12/Widget1-Happy-New-year-20121.png" style="position:fixed; top: 0px;right:0px;border:none;z-index:5;"/>

5. Now “Save” the widget, enjoy!

How To Add Happy New Year 2012 Balloons Widget To WordPress

  1. Goto WordPress Dashboard > Appearance > Widget and Drop a Text Widget to Sidebar
  2. Copy And Paste The Below Code Into The Text Widget:
<img src="https://allbloggingtips.com/wp-content/uploads/2011/12/Widget2-Happy-New-year-20121.png" style="position:fixed; top: 0px;left:0px;border:none;z-index:5;"/><img src="https://allbloggingtips.com/wp-content/uploads/2011/12/Widget1-Happy-New-year-20121.png" style="position:fixed; top: 0px;right:0px;border:none;z-index:5;"/>
 3.Click on Save Button and check your blog to see

That’s All. See the Happy New Year 2012 Balloons Widget on your blog. Hope you will enjoyed the post.. :)

New Year Countdown Widget For Blogger And WordPress

By Ammar Ali 1 Comment

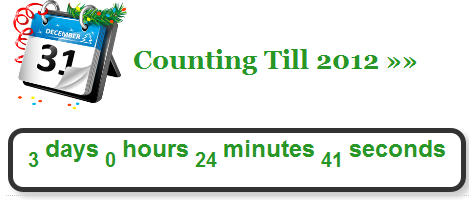
First of all I would like to wishes you Happy New Year 2012. I now comes with a cool New Year CountDown Widget For Blogger And WordPress Blogs for all Muslims, Christian and others. The countdown widget counts down to 31 December 2011 and in military time format by counting days, hours, minutes and seconds left for the coming New Year 2012  event. It also alerts and wishes New Year 2012 by generating a pop-up once the count down ends.

LIVE DEMO

See Previous Blogger Tutorial >> How Add Animated Favicons To Blogger

Add CountDown Gadget To Blogspot

  1. Go To Blogger > Design
  2. Choose HTML/JavaScript widget
  3. Paste the following code inside it,

<style style=”text/css”>

.lcdstyle{ /*Example CSS to create LCD countdown look*/
background:#fff;
color:#289728;
font: bold 20px arial;
padding: 15px;

border:5px solid #333333;

border-radius:15px;
-moz-border-radius:15px;
-webkit-border-radius:15px;
box-shadow: 5px 5px 5px #CCCCCC;
}

.lcdstyle sup{ /*Example CSS to create LCD countdown look*/
font-size: 120%
}

</style>

<script type=”text/javascript”>

function cdtime(container, targetdate){
if (!document.getElementById || !document.getElementById(container)) return
this.container=document.getElementById(container)
this.currentTime=new Date()
this.targetdate=new Date(targetdate)
this.timesup=false
this.updateTime()
}

cdtime.prototype.updateTime=function(){
var thisobj=this
this.currentTime.setSeconds(this.currentTime.getSeconds()+1)
setTimeout(function(){thisobj.updateTime()}, 1000) //update time every second
}

cdtime.prototype.displaycountdown=function(baseunit, functionref){
this.baseunit=baseunit
this.formatresults=functionref
this.showresults()
}

cdtime.prototype.showresults=function(){
var thisobj=this
var timediff=(this.targetdate-this.currentTime)/1000 //difference btw target date and current date, in seconds
if (timediff<0){ //if time is up
this.timesup=true
this.container.innerHTML=this.formatresults()
return
}
var oneMinute=60 //minute unit in seconds
var oneHour=60*60 //hour unit in seconds
var oneDay=60*60*24 //day unit in seconds
var dayfield=Math.floor(timediff/oneDay)
var hourfield=Math.floor((timediff-dayfield*oneDay)/oneHour)
var minutefield=Math.floor((timediff-dayfield*oneDay-hourfield*oneHour)/oneMinute)
var secondfield=Math.floor((timediff-dayfield*oneDay-hourfield*oneHour-minutefield*oneMinute))
if (this.baseunit==”hours”){ //if base unit is hours, set “hourfield” to be topmost level
hourfield=dayfield*24+hourfield
dayfield=”n/a”
}
else if (this.baseunit==”minutes”){ //if base unit is minutes, set “minutefield” to be topmost level
minutefield=dayfield*24*60+hourfield*60+minutefield
dayfield=hourfield=”n/a”
}
else if (this.baseunit==”seconds”){ //if base unit is seconds, set “secondfield” to be topmost level
var secondfield=timediff
dayfield=hourfield=minutefield=”n/a”
}
this.container.innerHTML=this.formatresults(dayfield, hourfield, minutefield, secondfield)
setTimeout(function(){thisobj.showresults()}, 1000) //update results every second
}

/////CUSTOM FORMAT OUTPUT FUNCTIONS BELOW//////////////////////////////

//Create your own custom format function to pass into cdtime.displaycountdown()
//Use arguments[0] to access “Days” left
//Use arguments[1] to access “Hours” left
//Use arguments[2] to access “Minutes” left
//Use arguments[3] to access “Seconds” left

//The values of these arguments may change depending on the “baseunit” parameter of cdtime.displaycountdown()
//For example, if “baseunit” is set to “hours”, arguments[0] becomes meaningless and contains “n/a”
//For example, if “baseunit” is set to “minutes”, arguments[0] and arguments[1] become meaningless etc
function formatresults(){
if (this.timesup==false){//if target date/time not yet met
var displaystring=arguments[0]+” days “+arguments[1]+” hours “+arguments[2]+” minutes “+arguments[3]+” seconds left until December 25, 2011 18:25:00″
}
else{ //else if target date/time met
var displaystring=””
}
return displaystring
}

function formatresults2(){
if (this.timesup==false){ //if target date/time not yet met
var displaystring=”<span class=’lcdstyle’>”+arguments[0]+” <sup>days</sup> “+arguments[1]+” <sup>hours</sup> “+arguments[2]+” <sup>minutes</sup> “+arguments[3]+” <sup>seconds</sup></span> ”
}
else{ //else if target date/time met
var displaystring=”” //Don’t display any text
alert(“HAPPY NEW YEAR EVERYBODY!“) //Instead, perform a custom alert
}
return displaystring
}

</script>
<table><tbody>
<tr>
<td>
<img style=”float:left; ” src=”http://3.bp.blogspot.com/-id6x2AOCGc4/TvoJfxRT-oI/AAAAAAAAFso/HKKnQ5bcnGY/s400/NEW%2BYEAR.png” width=”125px”/>
<h1 style=”color:#289728; padding-top:40px;”>Counting Till 2012 »»</h1><br/>
</td></tr>

<tr><td>
<div id=”countdowncontainer”></div>
<br />
<div id=”countdowncontainer2″></div>

<script type=”text/javascript”>

var futuredate=new cdtime(“countdowncontainer”, “March 23, 2009 18:25:00”)
futuredate.displaycountdown(“days”, formatresults)

var currentyear=new Date().getFullYear()
//dynamically get this Christmas’ year value. If Christmas already passed, then year=current year+1
var thischristmasyear=(new Date().getMonth()>=11 && new Date().getDate()>31)? currentyear+1 : currentyear
var christmas=new cdtime(“countdowncontainer2”, “December 31, “+thischristmasyear+” 0:0:00″)
christmas.displaycountdown(“days”, formatresults2)

</script>

</td></tr>
</tbody></table>


Add CountDown Widget to WordPress

Add below code to your sidebar widget and you have done.

<style style=”text/css”>

.lcdstyle{ /*Example CSS to create LCD countdown look*/
background:#fff;
color:#289728;
font: bold 20px arial;
padding: 15px;

border:5px solid #333333;

border-radius:15px;
-moz-border-radius:15px;
-webkit-border-radius:15px;
box-shadow: 5px 5px 5px #CCCCCC;

}

.lcdstyle sup{ /*Example CSS to create LCD countdown look*/
font-size: 120%
}

</style>

<script type=”text/javascript”>

function cdtime(container, targetdate){
if (!document.getElementById || !document.getElementById(container)) return
this.container=document.getElementById(container)
this.currentTime=new Date()
this.targetdate=new Date(targetdate)
this.timesup=false
this.updateTime()
}

cdtime.prototype.updateTime=function(){
var thisobj=this
this.currentTime.setSeconds(this.currentTime.getSeconds()+1)
setTimeout(function(){thisobj.updateTime()}, 1000) //update time every second
}

cdtime.prototype.displaycountdown=function(baseunit, functionref){
this.baseunit=baseunit
this.formatresults=functionref
this.showresults()
}

cdtime.prototype.showresults=function(){
var thisobj=this

var timediff=(this.targetdate-this.currentTime)/1000 //difference btw target date and current date, in seconds
if (timediff<0){ //if time is up
this.timesup=true
this.container.innerHTML=this.formatresults()
return
}
var oneMinute=60 //minute unit in seconds
var oneHour=60*60 //hour unit in seconds
var oneDay=60*60*24 //day unit in seconds
var dayfield=Math.floor(timediff/oneDay)
var hourfield=Math.floor((timediff-dayfield*oneDay)/oneHour)
var minutefield=Math.floor((timediff-dayfield*oneDay-hourfield*oneHour)/oneMinute)
var secondfield=Math.floor((timediff-dayfield*oneDay-hourfield*oneHour-minutefield*oneMinute))
if (this.baseunit==”hours”){ //if base unit is hours, set “hourfield” to be topmost level
hourfield=dayfield*24+hourfield
dayfield=”n/a”
}
else if (this.baseunit==”minutes”){ //if base unit is minutes, set “minutefield” to be topmost level
minutefield=dayfield*24*60+hourfield*60+minutefield
dayfield=hourfield=”n/a”
}
else if (this.baseunit==”seconds”){ //if base unit is seconds, set “secondfield” to be topmost level
var secondfield=timediff
dayfield=hourfield=minutefield=”n/a”
}
this.container.innerHTML=this.formatresults(dayfield, hourfield, minutefield, secondfield)
setTimeout(function(){thisobj.showresults()}, 1000) //update results every second
}

/////CUSTOM FORMAT OUTPUT FUNCTIONS BELOW//////////////////////////////

//Create your own custom format function to pass into cdtime.displaycountdown()
//Use arguments[0] to access “Days” left
//Use arguments[1] to access “Hours” left
//Use arguments[2] to access “Minutes” left
//Use arguments[3] to access “Seconds” left

//The values of these arguments may change depending on the “baseunit” parameter of cdtime.displaycountdown()
//For example, if “baseunit” is set to “hours”, arguments[0] becomes meaningless and contains “n/a”
//For example, if “baseunit” is set to “minutes”, arguments[0] and arguments[1] become meaningless etc

function formatresults(){
if (this.timesup==false){//if target date/time not yet met
var displaystring=arguments[0]+” days “+arguments[1]+” hours “+arguments[2]+” minutes “+arguments[3]+” seconds left until December 25, 2011 18:25:00″
}
else{ //else if target date/time met
var displaystring=””
}
return displaystring
}

function formatresults2(){
if (this.timesup==false){ //if target date/time not yet met
var displaystring=”<span class=’lcdstyle’>”+arguments[0]+” <sup>days</sup> “+arguments[1]+” <sup>hours</sup> “+arguments[2]+” <sup>minutes</sup> “+arguments[3]+” <sup>seconds</sup></span> ”
}
else{ //else if target date/time met
var displaystring=”” //Don’t display any text
alert(“HAPPY NEW YEAR EVERYBODY!”) //Instead, perform a custom alert
}
return displaystring
}

</script>
<table><tbody>
<tr> <td>
<img style=”float:left; ” src=”http://3.bp.blogspot.com/-id6x2AOCGc4/TvoJfxRT-oI/AAAAAAAAFso/HKKnQ5bcnGY/s400/NEW%2BYEAR.png” width=”125px”/>
<h1 style=”color:#289728; padding-top:40px;”>
Counting Till 2012 »»</h1>

</td></tr>
<tr><td>
<div id=”countdowncontainer”>
</div>

<div id=”countdowncontainer2″>
</div>

<script type=”text/javascript”>

var futuredate=new cdtime(“countdowncontainer”, “March 23, 2009 18:25:00”)
futuredate.displaycountdown(“days”, formatresults)

var currentyear=new Date().getFullYear()
//dynamically get this Christmas’ year value. If Christmas already passed, then year=current year+1
var thischristmasyear=(new Date().getMonth()>=11 && new Date().getDate()>31)? currentyear+1 : currentyear
var christmas=new cdtime(“countdowncontainer2”, “December 31, “+thischristmasyear+” 0:0:00″)
christmas.displaycountdown(“days”, formatresults2)

</script>

</td></tr>
</tbody></table>

Make these changes to its colors and font if you wish:

  • To change font color of the clock edit color:#289728;
  • To change border color edit border:5px solid #333333;
  • To change the text color edit color:#289728 4. Save your widget and drag it just above your blog posts body.
  • The purple texts can be easily edited to any message you wish to write.

How To Easily Create Animated Favicons And Add It To Blogger

By Ammar Ali 3 Comments

Favicon Demo

Favicon is actually the icon that appears next to your Website URL in the browser address bar. A favicon is usually your blog logo. There are many services which only provide you facility to add image to favicons only. But now you can Create Animated Favicons which will allow you to add image with animating text. I will show you How To Easily Create Animated Favicons And Add It To Blogger.

Steps To Easily Create Animated Favicons?

  • Goto FaviconGenerator
  • And Just goto Bottom of the page. Upload your image which you want to use for favicon and type desire text which you want to make animating You will find all the help at favicongenerator

Favicon Generator Screenshot

  • Hit the Generate Favicon Button and you will be taken to this page,

download animated favicon

Here you will see many images just right click the animated one and save it to your computer.

How To Add Animated Favicons In Blogger

    • Go To Blogger > Design > Edit HTML
    • And Search For <b:skin>and just above it paste the code below,
<link href='ADD YOUR FAVICON LINK HERE' rel='icon" type='image/gif'/>
  • Replace ADD YOUR FAVICON LINK HERE with the image URL of the favicon you saved in Picasa album.
  • Save your template and you are done!

View your blog to see it in action on the address bar and tabs. Hope you liked it! Questions are always welcomed here:>>

  • « Go to Previous Page
  • Page 1
  • Interim pages omitted …
  • Page 67
  • Page 68
  • Page 69
  • Page 70
  • Page 71
  • Page 72
  • Go to Next Page »

Primary Sidebar

Get Blogging & SEO Tips by Email

Get helpful blogging, SEO, and content tips delivered straight to your inbox. No spam.

Join 3,489 other subscribers

Popular Posts

  • Is Your Blog Properly Optimized for Performance and SEO?
  • 10 Powerful Ways to Become a Famous Blogger
  • Google AdSense vs Affiliate Marketing: A Simple Comparison for Beginners
  • Effective Ways to Increase Content Reach and Audience Engagement
  • 12 Things to Do Before Applying for Google AdSense
  • Are Backlinks Becoming Less Valuable in Modern SEO?
  • Step-by-Step Guide to Creating a Successful Travel Blog
  • How to Start as a Freelance Writer & Is It Worth?
  • Add Smooth Multi Level Drop-Down Menu In Blogger
  • How To Delete A Blogger Blog Permanently In 5 Minutes (+ FAQs)

Blogging Tools I Use

Over the years, I’ve tested dozens of blogging and WordPress tools. Below are the tools I personally use and recommend for blogging, performance, SEO, and monetization.

Blogging Tools I Use →

Categories

  • Announcement (12)
  • Ask The Readers (2)
  • Blogger (56)
    • Blogger Hacks (4)
    • Blogger Tips (24)
  • Blogging (108)
    • Blogging Tips (81)
    • Writing Tips (6)
  • Coupons (2)
  • Design (5)
  • Email Marketing (4)
  • Free Themes (1)
    • WordPress Themes (1)
  • Free Traffic (40)
    • Guest Blogging (7)
    • Search Engine Optimization (4)
    • Social Media (13)
  • Giveaway (16)
  • Hosting (14)
  • How To (48)
  • Latest News (1)
  • Make Money Online (37)
    • Adsense (7)
    • Affiliate Marketing (8)
  • Reviews (17)
  • SEO (46)
  • Social Media (13)
    • Facebook (5)
      • Tips and Tricks (3)
    • Twitter (2)
  • WordPress (54)
    • WordPress Plugins (17)
    • WordPress Themes (5)
    • WordPress Tricks (2)
    • WordPress Widgets (14)

Footer

About This Site

All Blogging Tips helps beginners learn how to start, grow, and monetize blogs using WordPress. I share practical guides and honest recommendations based on real blogging experience.

Read more →

Site & Resources

  • Tools I Use
  • About
  • Advertise Here
  • Contact
  • Disclosure Policy
  • Copyright Policy
  • Privacy Policy

Start & Grow Your Blog

  • A Ridiculously Helpful Guide to Start Your Own Blog In 10 Minutes
  • How To Grow Your Blog And Build An Audience
  • How To Make Money From Your Blog
  • Cheap WordPress Hosting
  • Free WordPress Hosting

Copyright © 2026 All Blogging Tips · Powered by InMotion Hosting · WordPress · Log in